YAY! Another Recipe Dedication!
This is for my colleague. Jane <3
I happen to remember that I had one can of tuna in water left in my drystore cabinet, so why not make some tuna pancakes? :D
Ingredients
============
1 canned tuna in water, smashed with a fork
half an onion, chopped & diced
1 garlic clove, chopped & diced
2 eggs
2-5 tablespoon plain flour
salt
pepper
vegetable oil/canola oil/sunflower oil
Instructions
====================
CCJ-1: Mix the canned tuna, diced onion and diced garlic together
CCJ-2: Crack 2 eggs in and mix well.
CCJ-3: Add flour (depending how pancake like you want it to be) and mix well
CCJ-4: Heat a generous amount of vegetable oil ( or other oil), in a skillet/pan
CCJ-5: Spoon the tuna pancake batter onto the heated pan and cook it until the bottom is golden brown.
CCJ-6: Once golden brown, flip them and cook the other side until golden brown too.
CCJ-7: When both sides are golden brown, drain excess oil and plate up
and Voila! You are ready to nom on these lovely tuna pancakes!
I bought them to office and gave to my close colleagues to nom, though my pancakes weren't very pancake-like cos' I only added 2 tablespoons of flour. (Will need to add more flour next time!)
Recently, I've been busy and broke to be honest, so that's why I didn't manage to do the recipes that I've listed at the left side column. oTL. Please bear with me lovelies.
With Much Love,
Sheila <3 XOXOXOXO
Thursday, July 19, 2012

Tuesday, June 26, 2012
Recipe Dedication: Claudia's Cornflake Cookies
Okay! Here's another recipe dedication. This time it's for my colleague, Claudia.
Haha, she's been pestering and reminding me to make these cookies for her as she really loves them a lot, and I mean a lot.
Just so happen, I got cornflakes from NTUC(a local supermarket) last night while grocery shopping for my dinner. So I thought, why not bake 'em?
Andddddd! I baked these lovelies in the early morning of 6am. Reasons being that my cats has been trying to wake me up from 5am in the damn morning cos' they're hungry. oTL
So Claudia, Here's to you! <3~!
Cornflake Cookies
==================
190C
Baking time : 15 min
Ingredients:
-----------------------
150g Butter
150g Sugar
1 egg
2 teaspoon baking powder
200g Flour
drops of vanilla essence
Instructions:
------------------------
C.C-1: Cream Butter and Sugar together until light and fluffy
C.C-2: Add Vanilla essence and egg and mix well.
C.C-3: Fold in the flour and baking powder (the dough would be sticky)
C.C-4: Crush 100g of cornflakes and fold into the dough.
C.C-5: Line your baking sheets with parchment paper/baking paper
C.C-6: Roll bits of dough and coat them with excess crushed cornflakes and press them on the baking sheet.
C.C-7: Bake in a pre-heated over at 190C for 15 mins
C.C-8: Remove from oven and leave to cool completely.
It's that simple! I brought a ziplock-full of these lovelies for Claudia just today and She's one happy girl, literally! hahaha! If you don't like cornflakes in your cookies and only want them coating the cookies, just simply omit the adding of crushed cornflakes into the dough.
And oh, did I mention that you can use Nestum as well? It tastes as beautiful and yummy like these cornflake cookies!.
With Much love,
Sheila <3 XOXOXOXOXO
Haha, she's been pestering and reminding me to make these cookies for her as she really loves them a lot, and I mean a lot.
Just so happen, I got cornflakes from NTUC(a local supermarket) last night while grocery shopping for my dinner. So I thought, why not bake 'em?
Andddddd! I baked these lovelies in the early morning of 6am. Reasons being that my cats has been trying to wake me up from 5am in the damn morning cos' they're hungry. oTL
So Claudia, Here's to you! <3~!
Cornflake Cookies
==================
190C
Baking time : 15 min
Ingredients:
-----------------------
150g Butter
150g Sugar
1 egg
2 teaspoon baking powder
200g Flour
drops of vanilla essence
Instructions:
------------------------
C.C-1: Cream Butter and Sugar together until light and fluffy
C.C-2: Add Vanilla essence and egg and mix well.
C.C-3: Fold in the flour and baking powder (the dough would be sticky)
C.C-4: Crush 100g of cornflakes and fold into the dough.
C.C-5: Line your baking sheets with parchment paper/baking paper
C.C-6: Roll bits of dough and coat them with excess crushed cornflakes and press them on the baking sheet.
C.C-7: Bake in a pre-heated over at 190C for 15 mins
C.C-8: Remove from oven and leave to cool completely.
It's that simple! I brought a ziplock-full of these lovelies for Claudia just today and She's one happy girl, literally! hahaha! If you don't like cornflakes in your cookies and only want them coating the cookies, just simply omit the adding of crushed cornflakes into the dough.
And oh, did I mention that you can use Nestum as well? It tastes as beautiful and yummy like these cornflake cookies!.
With Much love,
Sheila <3 XOXOXOXOXO
Monday, June 25, 2012
Pancakes for Breakfast! :B
Pancake Breakfast! This was one of the recipes that I've planned to 'complete'
Seriously, don't mind my oversized kiddy PJs, I know it looks really aloof.
Anywho, let's get started!
Ingredients:
190g all-purpose flour
10g white sugar
10g baking powder
6g salt
1 egg
45g melted butter
295ml milk
extra butter/oil for the pan
Instructions!:
P.C-1. Mix all the dry ingredients together
P.C-2. Add the wet ingredients and mix until smooth and lump free
P.C-3. Heat and oil your pan/skillet.
P.C-4. Spoon a ladle-full of batter onto the heated pan and cook until bubbles starts to burst at the surface
P.C-5. Once bubbles has burst at the surface, flip them over and cook them for another 2-3 minutes.
P.C-6. Serve on a plate with butter/honey/jam.
It's that easy! Took me about 20 minutes in total to get everything cooked and cleaned up. I love pancakes with honey! Natural sweetener, yum!
It's just too bad that there's no one else in the family to nom on them so I bought them to work as my snack. :B.
With much love,
Sheila <3 XOXOXOXO
Seriously, don't mind my oversized kiddy PJs, I know it looks really aloof.
Anywho, let's get started!
Ingredients:
190g all-purpose flour
10g white sugar
10g baking powder
6g salt
1 egg
45g melted butter
295ml milk
extra butter/oil for the pan
Instructions!:
P.C-1. Mix all the dry ingredients together
P.C-2. Add the wet ingredients and mix until smooth and lump free
P.C-3. Heat and oil your pan/skillet.
P.C-4. Spoon a ladle-full of batter onto the heated pan and cook until bubbles starts to burst at the surface
P.C-5. Once bubbles has burst at the surface, flip them over and cook them for another 2-3 minutes.
P.C-6. Serve on a plate with butter/honey/jam.
It's that easy! Took me about 20 minutes in total to get everything cooked and cleaned up. I love pancakes with honey! Natural sweetener, yum!
It's just too bad that there's no one else in the family to nom on them so I bought them to work as my snack. :B.
With much love,
Sheila <3 XOXOXOXO
Tuesday, June 19, 2012
microwave cookies
LO! it's another microwave recipe! LOL
I was really bored one night and went on to youtube to find random food recipes and all,
then I stumbled upon this microwave cookie recipe by Ochikeron, and I decided that I would try it out!
Ingredients:
----------------------
1/2cup = 125ml butter (softened) *100g (3.5oz.)
1/4cup = 62.5ml granulated sugar
1 egg
1cup = 250ml cake flour
1/2 tsp. baking powder
Instructions:
-----------------------------
M.C-1. Cream the butter and sugar until light and fluffy
M.C-2. Beat in the egg and mix well.
M.C-3. Fold in the cake flour and baking powder.
M.C-4. Spoon or pipe your cookie dough onto small pieces of baking paper and pop them in the microwave, on high for 2-3 minutes.
!*! Always look at the cookies, as they burn easily !*!
M.C-5. After 203 minutes, remove from microwave and leave to cool completely!
THAT"S ALL! Hahaha! this recipe is dead easy and dead fast.
You can add chocolate chips or dried fruits in, anything to your preference.
Microwave cooking often cooks food from the inside out hence it is always wise to keep an eye on your food while it's spinning round and round in the microwave.
UPDATE NOTE!
I have actually planned out recipes to start/finish up week by week so I do hope I have the time to do those and update as much as I can.
With Much Love,
Sheila XOXOXOXOXO!
I was really bored one night and went on to youtube to find random food recipes and all,
then I stumbled upon this microwave cookie recipe by Ochikeron, and I decided that I would try it out!
Ingredients:
----------------------
1/2cup = 125ml butter (softened) *100g (3.5oz.)
1/4cup = 62.5ml granulated sugar
1 egg
1cup = 250ml cake flour
1/2 tsp. baking powder
Instructions:
-----------------------------
M.C-1. Cream the butter and sugar until light and fluffy
M.C-2. Beat in the egg and mix well.
M.C-3. Fold in the cake flour and baking powder.
M.C-4. Spoon or pipe your cookie dough onto small pieces of baking paper and pop them in the microwave, on high for 2-3 minutes.
!*! Always look at the cookies, as they burn easily !*!
M.C-5. After 203 minutes, remove from microwave and leave to cool completely!
THAT"S ALL! Hahaha! this recipe is dead easy and dead fast.
You can add chocolate chips or dried fruits in, anything to your preference.
Microwave cooking often cooks food from the inside out hence it is always wise to keep an eye on your food while it's spinning round and round in the microwave.
UPDATE NOTE!
I have actually planned out recipes to start/finish up week by week so I do hope I have the time to do those and update as much as I can.
With Much Love,
Sheila XOXOXOXOXO!
Tuesday, June 12, 2012
Madeleines!
Another post up!
Well, I actually made Madeleine for the first time on Mother's day itself.
Often I'll find these beautiful sweet things selling in Delifrance, they comes in packs of 3-6?
Oven at 180C, middle Shelf/Rack
Ingredients
------------------
125g Plain Flour, Sifted 3 times
2 Eggs
170g Caster Sugar
185g Melted Butter
Instructions
--------------------
M.1 - Mix eggs and sugar in a heatproof bowl.
M.2 - Place egg mixture over a pot of boiling water ( Careful not to let the water touch the bottom of the bowl)
M.3 - Beat the mixture until pale and has thickened.
Well, I actually made Madeleine for the first time on Mother's day itself.
Often I'll find these beautiful sweet things selling in Delifrance, they comes in packs of 3-6?
Oven at 180C, middle Shelf/Rack
Ingredients
------------------
125g Plain Flour, Sifted 3 times
2 Eggs
170g Caster Sugar
185g Melted Butter
Instructions
--------------------
M.1 - Mix eggs and sugar in a heatproof bowl.
M.2 - Place egg mixture over a pot of boiling water ( Careful not to let the water touch the bottom of the bowl)
M.3 - Beat the mixture until pale and has thickened.
M.4 - Remove from heat and continue beating until thick
M.5 - Add melted butter and flour and fold into the batter
!.! Optional. For better looking madelienes, chill in the fridge for about 3o minutes to an hour!.!
M.6 - Spoon in the batter into a floured madeleine pan.
M.7 - Bake in a pre-heat oven at 180C for 12- 14 minutes.
M.8 - Remove and let it completely cool.
I actually didn't chill the batter before baking, that's why the top(bottom) of my madeleine are crackly and ugly.
Despite their appearances, they tasted really yummy! and it goes oh so well with any type of tea. *melts* I would sneak out one every night from the fridge and nom on them before going to bed. Fattening but oh so delicious!
With much love,
Sheila <3
Thursday, June 7, 2012
Recipe Dedication: Leon's Oyako Donburi
FINALLY A COOK POST!
Okay,This post is dedicated to my one of best buds, my junior, my awesum hair color bud, LEON TAI!
Here's to you Bro!
Before I start, here's Wiki's take on oyakodon.
Oyakodon (親子丼?), literally "parent-and-child donburi", is a donburi, or Japanese rice bowl dish, in which chicken, egg, sliced scallion (or sometimes regular onions), and other ingredients are all simmered together in a sauce and then served on top of a large bowl of rice. The name of the dish is a poetic reflection of the fact that both chicken and egg are used in the dish.
The simmering sauce varies according to season, ingredients, region, and taste. A typical sauce might consist of dashi flavored with soy sauce and mirin. Proportions vary, but usually there is three to four times as much dashi as soy sauce and mirin. For oyakodon, Tsuji (1980) recommends dashi flavored with light soy sauce, dark soy sauce, and sugar.
To make oyakodon, cut chicken and other ingredients into bite-sized pieces. Heat ¼ cup simmering sauce in a small frying pan. Add chicken (and sliced onion, if desired) and simmer until the chicken is cooked. Then add scallions and other ingredients. When all ingredients are cooked, slowly pour 1–2 lightly beaten eggs evenly over the whole dish. When eggs are nearly cooked (edges set), slide the topping from the pan onto hot cooked rice served in a large bowl. The hot rice will finish cooking the eggs.
Several other Japanese dishes pun on the parent-and-child theme of oyakodon. Tanindon (他人丼?), literally "stranger bowl", is otherwise identical but replaces the chicken with beef. A dish of salmon and roe served raw over rice is known as sake oyakodon (鮭親子丼?).
Now the real thing starts!
Oyako Donburi - Serves 1-2
------------------------
Sauce:
3 Tablespoon light soy sauce
1 Teaspoon distilled vinegar
2 Teaspoon mirin
1 Teaspoon Sake (optional)
2-3 Tablespoon sugar
1/2 cup hot water
Toppings:
100g Chicken Fillet, diced
half an onion, sliced
any vegetables you like
1-2 egg
1 bowl of rice
Instructions!
-------------------
Sauce:
S-1. Add all the condiments together and mix well!
Cook:
C-1. Heat a pan up and oil it.
C-2. When the oil heats up, add onions and saute the onions until translucent
C-3. Add chicken and brown the meat
C-4. Add in other vegetables, (I went with asparagus!:3)
C-5. Add the sauce in and gently bring it to a light boil.
C-6. Swirl in the beaten egg and let it cook for another 2 minutes.
C-7. Top your hot bowl of rice with the oyako topping.
Voila! you're ready to nom down in this fast and hearty meal!
This was actually one of the first few things that my late father has taught me since late primary school so that me and my brother would be able to cook and eat when no one else was home. My dad would actually dice the chicken, slice the onion, make the sauce and put them in separate containers and pop them in the fridge, ready to cook anytime. Dad's sauce was always by 'feeling' and own taste preference, ever since I've been making this sauce by 'feeling' but I figured if I were to make into a cook post, I would have to list down the measurements. hahaha!
With Much Love,
Sheila <3
Okay,This post is dedicated to my one of best buds, my junior, my awesum hair color bud, LEON TAI!
Here's to you Bro!
Before I start, here's Wiki's take on oyakodon.
Oyakodon (親子丼?), literally "parent-and-child donburi", is a donburi, or Japanese rice bowl dish, in which chicken, egg, sliced scallion (or sometimes regular onions), and other ingredients are all simmered together in a sauce and then served on top of a large bowl of rice. The name of the dish is a poetic reflection of the fact that both chicken and egg are used in the dish.
The simmering sauce varies according to season, ingredients, region, and taste. A typical sauce might consist of dashi flavored with soy sauce and mirin. Proportions vary, but usually there is three to four times as much dashi as soy sauce and mirin. For oyakodon, Tsuji (1980) recommends dashi flavored with light soy sauce, dark soy sauce, and sugar.
To make oyakodon, cut chicken and other ingredients into bite-sized pieces. Heat ¼ cup simmering sauce in a small frying pan. Add chicken (and sliced onion, if desired) and simmer until the chicken is cooked. Then add scallions and other ingredients. When all ingredients are cooked, slowly pour 1–2 lightly beaten eggs evenly over the whole dish. When eggs are nearly cooked (edges set), slide the topping from the pan onto hot cooked rice served in a large bowl. The hot rice will finish cooking the eggs.
Several other Japanese dishes pun on the parent-and-child theme of oyakodon. Tanindon (他人丼?), literally "stranger bowl", is otherwise identical but replaces the chicken with beef. A dish of salmon and roe served raw over rice is known as sake oyakodon (鮭親子丼?).
Now the real thing starts!
Oyako Donburi - Serves 1-2
------------------------
Sauce:
3 Tablespoon light soy sauce
1 Teaspoon distilled vinegar
2 Teaspoon mirin
1 Teaspoon Sake (optional)
2-3 Tablespoon sugar
1/2 cup hot water
Toppings:
100g Chicken Fillet, diced
half an onion, sliced
any vegetables you like
1-2 egg
1 bowl of rice
Instructions!
-------------------
Sauce:
S-1. Add all the condiments together and mix well!
Cook:
C-1. Heat a pan up and oil it.
C-2. When the oil heats up, add onions and saute the onions until translucent
C-3. Add chicken and brown the meat
C-4. Add in other vegetables, (I went with asparagus!:3)
C-5. Add the sauce in and gently bring it to a light boil.
C-6. Swirl in the beaten egg and let it cook for another 2 minutes.
C-7. Top your hot bowl of rice with the oyako topping.
Voila! you're ready to nom down in this fast and hearty meal!
This was actually one of the first few things that my late father has taught me since late primary school so that me and my brother would be able to cook and eat when no one else was home. My dad would actually dice the chicken, slice the onion, make the sauce and put them in separate containers and pop them in the fridge, ready to cook anytime. Dad's sauce was always by 'feeling' and own taste preference, ever since I've been making this sauce by 'feeling' but I figured if I were to make into a cook post, I would have to list down the measurements. hahaha!
With Much Love,
Sheila <3
Wednesday, June 6, 2012
Apple Pie~!
HOKAY! I've been craving apple pies for sometime (I crave for a lot of food actually, haha!)
I'll keep things short and sweet! :D
Ingredients
----------------------
300g Apples, peeled and chopped into bite sized cubes
100g Sugar
Half a lemon
Dough:
130g flour
100g cold butter
20-30ml cold water
Preheat oven at 230C.
*Bishi Bashi Voice* Instructions!
-------------------------------------------------
Filling:
F-1. Add apples and sugar into pot and cook over medium heat.
F-2. Squeeze half a lemon and mix well. Continue cooking until apples are soft
F-3. About 15 minutes later, remove pot from heat and leave to cool completely.
Dough:
D-1. Rub the cold butter into the flour, it should resemble bread crumbs
D-2. Add cold water bit by bit, you don't need to use it all anyway
! If the dough is too wet, add more flour. If dough is too dry, add water !
Assembly:
A-1. Press small dough balls into the mould.
~!~ If you're making a normal pie size, roll the dough out on a floured board and place the dough over the pan and adjust. ~!~
A-2. Spoon in the apple filling.
A-3. Cover with dough, Here's where you can be creative with your pie tops
A-4. Glaze your pies with 1 beaten egg.
A-5. Bake them lovelies in a preheat oven at 230C for 15 minutes
A-6. After 15 minutes, Take them out and leave them to cool completely.
*Optional*Once cooled, you have pop them in the fridge and serve later
That's all for the apple pie!
Well, you could tell that I was being lazy with my pie top, mainly because I took this video around 10PM and I'm feeling the sleepy monster attacking my body.
You can eat your apple pie with ice cream, whipped cream or anything that you like to have them with.
Wonderful for tea and dessert them lovelies. <3
With Much Love,
Sheila <3
I'll keep things short and sweet! :D
Ingredients
----------------------
300g Apples, peeled and chopped into bite sized cubes
100g Sugar
Half a lemon
Dough:
130g flour
100g cold butter
20-30ml cold water
Preheat oven at 230C.
*Bishi Bashi Voice* Instructions!
-------------------------------------------------
Filling:
F-1. Add apples and sugar into pot and cook over medium heat.
F-2. Squeeze half a lemon and mix well. Continue cooking until apples are soft
F-3. About 15 minutes later, remove pot from heat and leave to cool completely.
Dough:
D-1. Rub the cold butter into the flour, it should resemble bread crumbs
D-2. Add cold water bit by bit, you don't need to use it all anyway
! If the dough is too wet, add more flour. If dough is too dry, add water !
Assembly:
A-1. Press small dough balls into the mould.
~!~ If you're making a normal pie size, roll the dough out on a floured board and place the dough over the pan and adjust. ~!~
A-2. Spoon in the apple filling.
A-3. Cover with dough, Here's where you can be creative with your pie tops
A-4. Glaze your pies with 1 beaten egg.
A-5. Bake them lovelies in a preheat oven at 230C for 15 minutes
A-6. After 15 minutes, Take them out and leave them to cool completely.
*Optional*Once cooled, you have pop them in the fridge and serve later
That's all for the apple pie!
Well, you could tell that I was being lazy with my pie top, mainly because I took this video around 10PM and I'm feeling the sleepy monster attacking my body.
You can eat your apple pie with ice cream, whipped cream or anything that you like to have them with.
Wonderful for tea and dessert them lovelies. <3
With Much Love,
Sheila <3
Saturday, June 2, 2012
Vanilla Cupcake with Buttercream Frosting
Okayyy~ Might as well update some more now that it's the weekend and I'm kinda free(?)
I've made this quite a while back because I was bored and really needed to be in the kitchen to meddle around with my flours, eggs, butter and sugar. <3
So here goes!
Pre-heat Oven at 180C/350F
Ingredient list
~ Vanilla Cupcake ~
- 113g(1/2 cup) unsalted butter, softened
- 2/3 cup granulated white sugar
- 3 eggs
- 1 tsp vanilla extract/flavoring/essence
- 1 1/2 cup all purpose flour
- 1 1/2 tsp baking powder
- 1/4 tsp salt
- 1/4 cup milk
~Buttercream Frosting~
- 2 cups icing sugar
- 113g(1/2 cup) unsalted butter, softened
- 1 tsp vanilla extract/flavoring/essence
- 2 to 3 tbsp milk
Instructions!*Bishi Bashi voice*
--------------------------------------------
Pop in the video!
1. Cream butter and sugar until light and fluffy
2. Beat in one egg at a time and mix well, followed by the vanilla essence
3. Add flour and milk alternately, starting with flour and ending with flour. (flour milk flour milk flour)
4.Fill your lined cupcake/muffin pan up till 2/3 full
5. Pop them into a preheated oven of 180C, and bake them for 20 minutes.
While them babies are baking , Let's make the buttercream frosting
B.C 1. Cream icing sugar and butter together until creamy
B.C 2. Add vanilla extract and milk and mix well
*Optional* Add any other flavorings or colors that you want to have. :D
6. After 20 minutes, remove from oven and let it cool completely till room temperature.
7. When it is cooled to room temperature, prepare your piping bag with your favorite nozzle and start decorating them babies!
These can be stored in the fridge for a maximum of 3 days. But best to eat it fresh on the same day.
Enjoy them lovelies as breakfast, with afternoon tea and even a simple sweet dinner treat. You can also pack them up and give them as small food gifts to family, friends and colleagues!
If you do make them and decorated them with icing, Share your photos with us! We'll post them up and share our cute and pretty icing decorations, as well as techniques on piping and decoration! :D
With Much Love,
Sheila <3
I've made this quite a while back because I was bored and really needed to be in the kitchen to meddle around with my flours, eggs, butter and sugar. <3
So here goes!
Pre-heat Oven at 180C/350F
Ingredient list
~ Vanilla Cupcake ~
- 113g(1/2 cup) unsalted butter, softened
- 2/3 cup granulated white sugar
- 3 eggs
- 1 tsp vanilla extract/flavoring/essence
- 1 1/2 cup all purpose flour
- 1 1/2 tsp baking powder
- 1/4 tsp salt
- 1/4 cup milk
~Buttercream Frosting~
- 2 cups icing sugar
- 113g(1/2 cup) unsalted butter, softened
- 1 tsp vanilla extract/flavoring/essence
- 2 to 3 tbsp milk
Instructions!*Bishi Bashi voice*
--------------------------------------------
Pop in the video!
1. Cream butter and sugar until light and fluffy
2. Beat in one egg at a time and mix well, followed by the vanilla essence
3. Add flour and milk alternately, starting with flour and ending with flour. (flour milk flour milk flour)
4.Fill your lined cupcake/muffin pan up till 2/3 full
5. Pop them into a preheated oven of 180C, and bake them for 20 minutes.
While them babies are baking , Let's make the buttercream frosting
B.C 1. Cream icing sugar and butter together until creamy
B.C 2. Add vanilla extract and milk and mix well
*Optional* Add any other flavorings or colors that you want to have. :D
6. After 20 minutes, remove from oven and let it cool completely till room temperature.
7. When it is cooled to room temperature, prepare your piping bag with your favorite nozzle and start decorating them babies!
These can be stored in the fridge for a maximum of 3 days. But best to eat it fresh on the same day.
Enjoy them lovelies as breakfast, with afternoon tea and even a simple sweet dinner treat. You can also pack them up and give them as small food gifts to family, friends and colleagues!
If you do make them and decorated them with icing, Share your photos with us! We'll post them up and share our cute and pretty icing decorations, as well as techniques on piping and decoration! :D
With Much Love,
Sheila <3
Friday, June 1, 2012
cake in a mug: Milo Flavor
Well...Since I DO have the time, why not another post? :D
I made this Cake-In-A-Mug for breakfast in my office where I'm currently working at and this video was taken like about 2 months ago(?). Procrastination resides in nearly everyone hahaha!
I "wow-ed" many of my colleagues in office and been nicknamed by a colleague as "Mini Betty Crocker" ._.
Anywho, Heres the Ingredients!
Ingredients
-----------
2 tablespoon self raising flour
2 tablespoon sugar
1 egg
1 tablespoon milk
1 tablespoon sunflower oil
Instructions!
------------------------------
1. Mix the flour and sugar together in a mug(any mug would do! )
2. Crack one egg in and mix well!
3. Add sunflower oil and milk and mix well!
*OPTIONAL!* You can add dried fruits, chocolate bits, coffee powder, milo powder. well anything you like:)
4. Pop your mug into the microwave, on HIGH for 3 minutes.
[Timing varies with the voltage on the microwave, so just adjust the timing to get your desired cake]
5. After 3 minutes, remove from microwave and Enjoy!
This is really a great comfort food on any day or if you're really hungry but want something simple and sweet.
With Much Love,
Sheila <3
I made this Cake-In-A-Mug for breakfast in my office where I'm currently working at and this video was taken like about 2 months ago(?). Procrastination resides in nearly everyone hahaha!
I "wow-ed" many of my colleagues in office and been nicknamed by a colleague as "Mini Betty Crocker" ._.
Anywho, Heres the Ingredients!
Ingredients
-----------
2 tablespoon self raising flour
2 tablespoon sugar
1 egg
1 tablespoon milk
1 tablespoon sunflower oil
Instructions!
------------------------------
1. Mix the flour and sugar together in a mug(any mug would do! )
2. Crack one egg in and mix well!
3. Add sunflower oil and milk and mix well!
*OPTIONAL!* You can add dried fruits, chocolate bits, coffee powder, milo powder. well anything you like:)
4. Pop your mug into the microwave, on HIGH for 3 minutes.
[Timing varies with the voltage on the microwave, so just adjust the timing to get your desired cake]
5. After 3 minutes, remove from microwave and Enjoy!
This is really a great comfort food on any day or if you're really hungry but want something simple and sweet.
With Much Love,
Sheila <3
Blueberry Crumble Muffin
Hello Hello! Okay, It's been ages since I've last updated.
Have been busy with work and trying to take food tutorial videos with all the testing and all, hahaha!
I came across this recipe from a cookbook, Okashi, by a Japanese lady who bakes wonderful goodies, from cookies to cakes to even pet treats! Yay! And also the cravings for muffins has been nagging at me for quite a long while so I decided to give this recipe a go.
Oven: 180C, Middle Shelf/Rack
Ingredients:
------------------
Crumble:
20g Cold Butter
20g Top Flour/Pastry Flour
20g Caster Sugar
(I doubled my quantity to make more, but here's for 6 muffins)
Muffin:
120g Top flour/Pastry flour, sifted twice
1 tsp baking powder
50g Butter
40g Brown Sugar
30g Caster Sugar
1 Egg
60ml cold milk
100g Blueberries
Instructions! (For some reason, this reminds me of an arcade game, Bishi Bashi, Eng Ver. :3)
-----------------------------------------------------------------------------------------------
And YES! I made a video of it all! hahaha!
To make the crumble:
1. Rub the cold butter into the flour and sugar mixture.
2. Chill the crumble in the fridge.
Muffin!
1. Cream butter, sugar and brown sugar until it turns creamy and pale brown
2. Beat in the eggs and mix well
3. Fold in the flour and milk alternately, starting with flour then milk, in batches. (start with flour and end with flour)
4. Fold in your blueberries!
5. Spoon your batter into lined cupcake/muffin tray and sprinkle the crumble over the batter.
6. Pop them babies into a pre-heated oven @ 180C, and bake for 30 minutes.
7. After 30 minutes, bring the babies out to cool.
Enjoy your muffin with a cup of milk, tea, coffee or anything that you like to drink with your bakes.
Actually, I've made a few bake videos already but I didn't have the free to really upload and post it here. I'll try to update as much as possible! :DD
With Much Love,
Sheila <3
Have been busy with work and trying to take food tutorial videos with all the testing and all, hahaha!
I came across this recipe from a cookbook, Okashi, by a Japanese lady who bakes wonderful goodies, from cookies to cakes to even pet treats! Yay! And also the cravings for muffins has been nagging at me for quite a long while so I decided to give this recipe a go.
Oven: 180C, Middle Shelf/Rack
Ingredients:
------------------
Crumble:
20g Cold Butter
20g Top Flour/Pastry Flour
20g Caster Sugar
(I doubled my quantity to make more, but here's for 6 muffins)
Muffin:
120g Top flour/Pastry flour, sifted twice
1 tsp baking powder
50g Butter
40g Brown Sugar
30g Caster Sugar
1 Egg
60ml cold milk
100g Blueberries
Instructions! (For some reason, this reminds me of an arcade game, Bishi Bashi, Eng Ver. :3)
-----------------------------------------------------------------------------------------------
And YES! I made a video of it all! hahaha!
To make the crumble:
1. Rub the cold butter into the flour and sugar mixture.
2. Chill the crumble in the fridge.
Muffin!
1. Cream butter, sugar and brown sugar until it turns creamy and pale brown
2. Beat in the eggs and mix well
3. Fold in the flour and milk alternately, starting with flour then milk, in batches. (start with flour and end with flour)
4. Fold in your blueberries!
5. Spoon your batter into lined cupcake/muffin tray and sprinkle the crumble over the batter.
6. Pop them babies into a pre-heated oven @ 180C, and bake for 30 minutes.
7. After 30 minutes, bring the babies out to cool.
Enjoy your muffin with a cup of milk, tea, coffee or anything that you like to drink with your bakes.
Actually, I've made a few bake videos already but I didn't have the free to really upload and post it here. I'll try to update as much as possible! :DD
With Much Love,
Sheila <3
Tuesday, August 9, 2011
Japanese Curry Udon
This has to be my favorite Japanese food out of my list of Japanese food.


Japanese Curry. Served with either Rice, Ramen, Udon and even Bread.
Here's Wikipedia's take on Japanese Curry
----------------------------------------------------
Curry (カレー karē) is one of the most popular dishes in Japan. It is commonly served in three main forms: curry rice (カレーライス karē raisu), karē udon (thick noodles) and karē-pan (bread). Curry rice is most commonly referred to simply as 'curry' (カレー karē).
A wide variety of vegetables and meats are used to make Japanese curry. The basic vegetables are onions, carrots, and potatoes. For the meat, beef, pork, chicken and sometimes duck are the most popular. Katsu-karē is a breaded deep-fried pork cutlet with curry sauce.
Curry was introduced to Japan during the Meiji era (1868–1912) by the British, at a time when India was under the administration of theBritish. The dish became popular and available for purchase in supermarkets and restaurants in the late 1960s. It has been adapted since its introduction to Japan, and is so widely consumed that it can be called a national dish.[1]
[with credits to http://www.wikipedia.com/ ]-------------------------------------------------------
Some grocery shopping first. Hunt for your Japanese Curry blocks. They come in varieties of brands and intensiveness of curry hotness, eg, mild, medium, hot.

I tried with this brand first. The mild taste of honey and apple sounded really tempting and nice to me. Haha! :D
Let's start cooking! *Puts on apron*
Ingredients - Cooks for 5
--------------
- 1 small package of Japanese Curry of your choice.
- 1 large white onion
- 2 medium sized potatoes
- 2 medium sized carrots
- 2 fillet of chicken thigh without bone/ breast (or any meat you desire)
- 3 cups water
- 5 packages of Udon.
Instructions
---------------
1. Dice up your onions, rolling cut the potatoes and carrots ( a cutting method where you roll the vegetable per cuts you make.) and chop your chicken meat into bite size pieces.
2. Heat up the pan, oil the pan and saute the onions till aromatic and translucent in color.

3. Add in your chopped vegetables and lightly brown them.

4. After the vegetables has been lightly browned, add the meat in and also lightly cooking them.
5. Add in the water ( make sure it covers the ingredients nicely )

6. Chop the curry blocks into pieces and put them into the pan, distributing them evenly and stir to mix in.


7. Let the curry simmer for at lest 20 minutes under low heat. This will thicken the curry.

8. After simmering for 20 minutes, cook your udon accordingly to the manufacture's instruction on the package.

9. Scoop and pour curry over the udon and serve!

Yummy yum yum!
I'm taking away the printable link for a while till I can get a better one.
Sorry Dearies! >_<
Anyway, enjoy cooking this wonderful japanese curry!
With love,
Sheila <3<3<3!
Sunday, July 3, 2011
Buttermilk Biscuits
Ever crave for Popeye's or Texas Chicken's Biscuits? Wanna buy 'em but they are kinda expensive?


FRET NOT! Now you can make them, homemade baby! :DD*Winks*
Ingredient(s)
==============
- 2 cups all-purpose flour/plain flour
- 2 tablespoon baking powder
- 1/4 teaspoon baking soda
- 1 teaspoon salt
- 100g unsalted butter, frozen
- 3/4 cups cold buttermilk
Method
==============
~~Oven Temperature to 220 degrees Celsius ~~
1. Mix the flour, baking powder, baking soda and salt with a wired whisk/balloon whisk, to aerate the flour mixture.

2. Add in the butter and mix the butter with the flour using the wired whisk/balloon whisk till the flour resembles bread flour.
3. Make a well in the center, and pour in the buttermilk and using a spatula, gently cover the buttermilk with the flour and lightly mix, just enough to coat the dry ingredients.
4. Turn the dough out and gather them up, (Don't worry about the excess crumbs), and shape it into a rectangle.
5. Press the dough down and then fold in 3 parts. (left to center, right to center), turn it over and repeat for 2 more times.
6. Roll the dough out on a floured board/flat surface and using a simple cookie cutter to cut. Roll up the excess and continue to get more pieces.

7. Place the dough onto a greased baking tray or onto parchment paper lined baking tray. Using your thumb to make an indent in the center of the dough, [This will help it rise uniformly.], and lightly coat the top with buttermilk
8. Bake them for 15 minutes.
9. Remove from oven and cool.


10. Serve with jam or other condiments.
HOHO! There you have it! Homemade Buttermilk Biscuits!
Dreadfully sorry for the lack of pictures, I'm doing this on my own and when I reached the kneading the dough, my hands are all stuck with dough and couldn't take a picture.
Our Printable Available here! : Prints!
Enjoy Darlings!
With love,
Sheila <3
Monday, June 27, 2011
Canned Fruit Agar Agar
Woo! Double Post! YAY!


A refreshing Dessert for a hot weather here in Tropical Singapore!
Ingredient List
============
- 30g agar agar Strips
- 1200ml Water + extra water for soaking the agar agar
- sugar to taste
- Preferred Canned fruits (peach, longans, pineapple, etc)
- Optional: Flavorings + Colorings
Instructions
==========
1. Wash and soak the agar agar strips for 10 minutes.


2. While the strips are soaking, boil 1200ml of water.
3. After 10 minutes and the water is boiling, add the agar agar strips and add sugar to taste and stir occasionally to melt and prevent from burning/scalding.

4. chop up canned fruits and set aside.
5. Once fully dissolved, remove from heat and let it set for 1 minute.
6. Put chopped canned fruits into the jelly molds and scoop the agar agar over the fruits in the jelly molds.
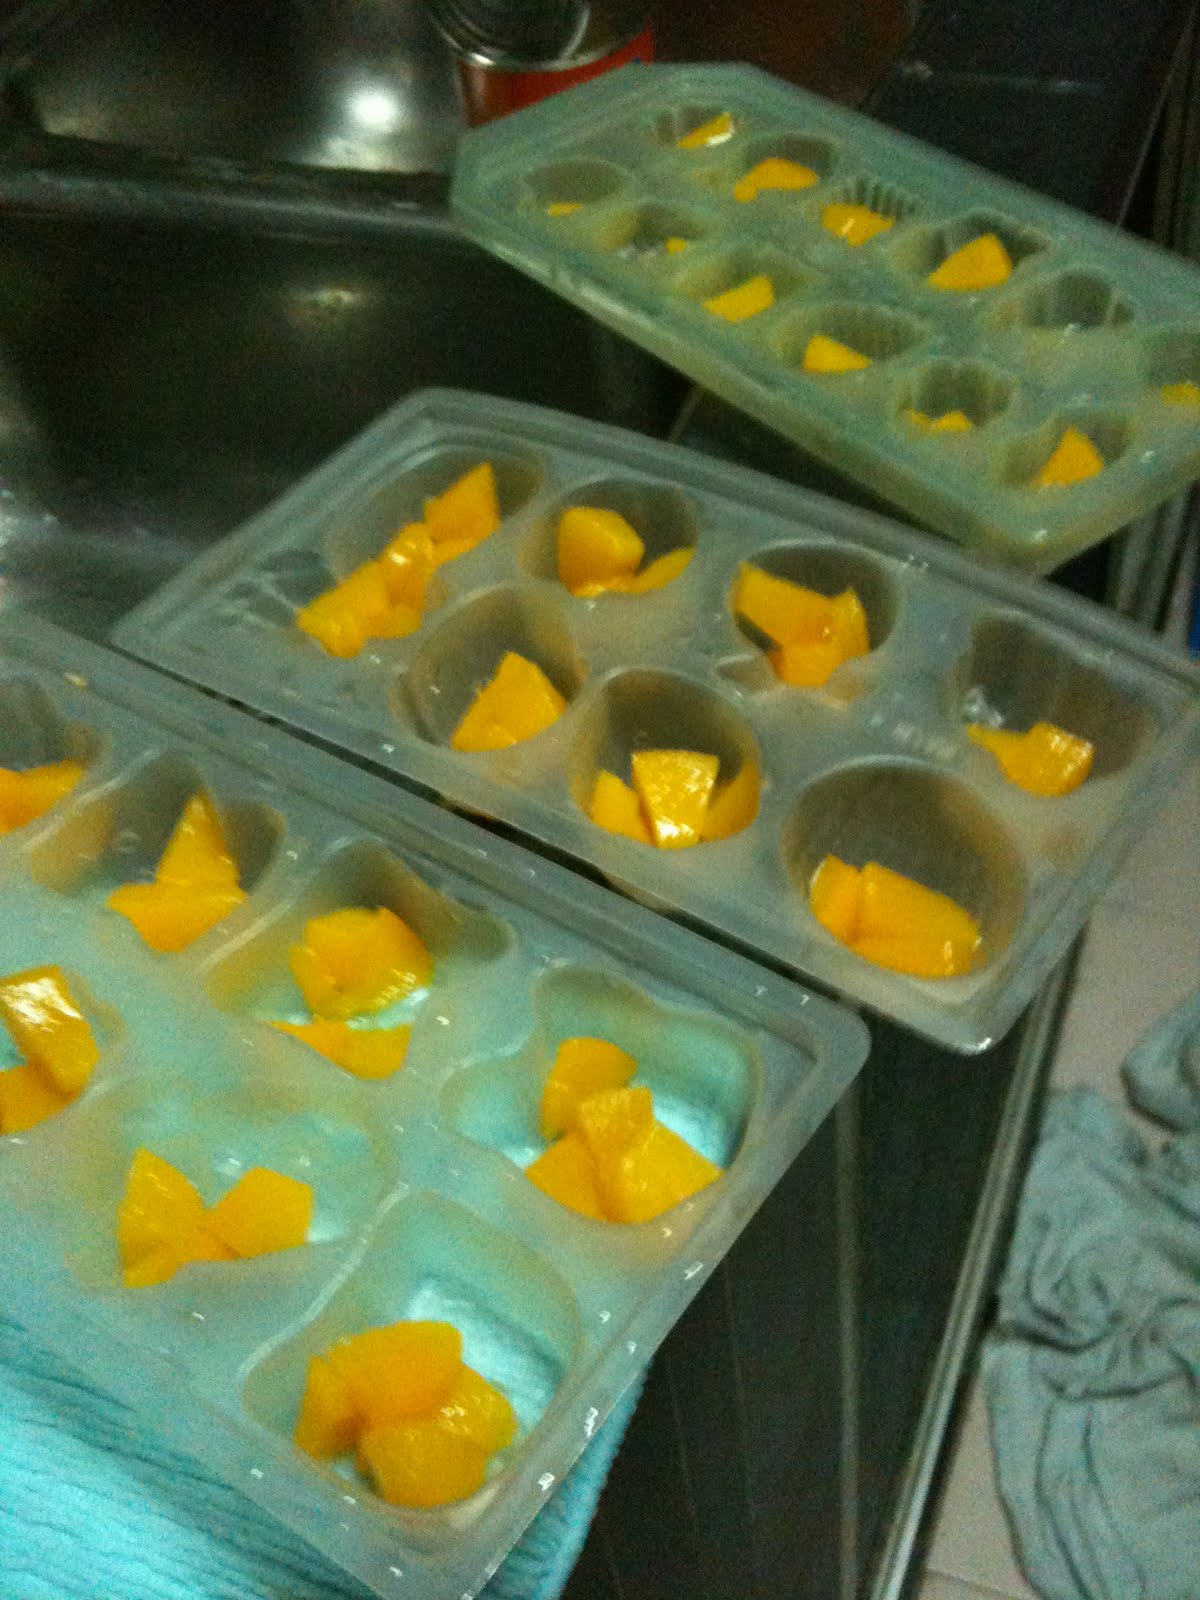
7. Leave the agar agar to completely cool and chill in the fridge.
8. Serve cold.

enjoy this yummy treat for the hot weather! yes!
Printable Recipe Available Here! : Print Page
With Love,
Sheila, Double <3
Campbell Chicken Mushroom Soup Baked Rice
Hello All! It's been a long while since I've last updated due to unforeseen circumstances.


Here goes people! Baked Rice! Yum-meh~! *slurps*
Ingredient List
===========
- 150g Chicken thigh/fillet/breast ( up to you which part you like most )
- half(1/2) can of Campbell Soup, Creamy Chicken Mushroom (Also up to your favorite preference )
- half(1/2) can of button mushroom ( or any of your choice, organic/canned)
- 1 cup of cooked rice.
- Choice of cheese = Mozzarella, Cheddar, Parmesan, etc
- Salt & Pepper for seasoning.
~~*~~ Before I start, If you want to Up quantity as you want to cook for more people, Let's say 5 ( Which I did cook for 5 on sunday.) here's my estimated list
450g chicken, 2 cans of campbell soup, 1 can of mushroom, 3 1/2 cups of rice
A lot huh? haha! ~~*~~
Instructions
==========
**Set your oven temperature to 200 Degrees Celsius. Don't worry it won't burn your cheese**
1. Chop your chicken into bite size pieces and cut your mushrooms into quarters
2. Pan Fry the chicken and mushroom, lightly season with pepper and salt to your liking. Set aside.

3. Cook your campbell soup accordingly to the instructions on the can. eg 1 can + 1 can water.

4. While the soup is cooking, cook your rice! or you can cook it beforehand.
5. Add the chicken & mushroom into the soup and stir well.

6. Still in your rice cooker pot, Pour in the soup and stir to evenly incorporate the soup, chicken and mushroom with the rice.

7. Serve up the rice in a oven proof bowl and cover up with CHEESE!


8. Place your bowl(s) into the oven and let the cheese melt till your liking.
9. Remove from the oven and Serve hot!

Enjoy Homemade Baked Rice. Hot and delicious to your body!
Printable Recipe Available Here! : Print Page
With Love,
Sheila<3
Wednesday, May 11, 2011
Milk Longan Pudding / Agar Agar
LONGAN LONGAN LONGAN LONGAN! My craving just wont stop! Lol.
Another craving of the week, milk longan pudding! <3
It's been years since I had it. My aunt used to make it last time and I love it! Sadly she just don't make them anymore. =3=
It's really easy to make and very less time is needed! I highly recommend to try it!
Recipe adapted from Jiayeen

I've left pandan leaves out of my pudding because I've forgotten to bring it back from my house.. XD
Remember to boil the agar agar strips till it melt thoroughly~
Let the mixture cool under a fan for about 10minute before putting it into the container. Not too long! Because it will solidify at room temperature! Leave it continue cooling down to room temperature in the container then put it into the fridge.
Tadah~ The ugly one that I kept it for myself. XD

The pretty one for my friend

It is pretty important to pick, or more like lucky draw on a can of good canned longan. The can I bought wasn't made with fresher longan. Although it is canned, but sometime it really depends on your luck in getting a good or bad batch of it. Good ones will have similar crisp with fresh longan and bad ones are similar with lychee. Not really that bad but I didn't quite like the texture of bad longan. D=
I was really afraid if the pudding didn't turn out well because the canned longan tasted a little sour. I'm glad it didn't! I personally prefer a creamier taste, so probably I'll try with 1 and a half can of evaporated milk next time. =D
Enjoy!
Good luck in trying!
I hope you enjoyed the recipe as well. ^_^
With love,
Aiko
Another craving of the week, milk longan pudding! <3
It's been years since I had it. My aunt used to make it last time and I love it! Sadly she just don't make them anymore. =3=
It's really easy to make and very less time is needed! I highly recommend to try it!
Recipe adapted from Jiayeen
Ingredients:
* 1500ml Water
* 1/2 packet Agar-agar Strips
* 150g Caster Sugar
* 3 leaves Pandan Leaf
* 1 tin Longan in Heavy Syrup
* 1 tin "Carnation" Evaporated Creamer
* Plastic container with cover
Method:
1. Place water, agar-agar strips, caster sugar & pandan leaves in a pot, bring to boil. Turn off the fire & remove pandan leaves.
2. Pour in longan syrup & evaporated Creamer, stir well.Leave to cool.
^Don't leave it cool! The mixture will solidify at room temperature.
3. Apportion 1 tin of longan fruit into the mini-containers & pour in the agar-agar mixture.

I've left pandan leaves out of my pudding because I've forgotten to bring it back from my house.. XD
Remember to boil the agar agar strips till it melt thoroughly~
Let the mixture cool under a fan for about 10minute before putting it into the container. Not too long! Because it will solidify at room temperature! Leave it continue cooling down to room temperature in the container then put it into the fridge.
Tadah~ The ugly one that I kept it for myself. XD

The pretty one for my friend

It is pretty important to pick, or more like lucky draw on a can of good canned longan. The can I bought wasn't made with fresher longan. Although it is canned, but sometime it really depends on your luck in getting a good or bad batch of it. Good ones will have similar crisp with fresh longan and bad ones are similar with lychee. Not really that bad but I didn't quite like the texture of bad longan. D=
I was really afraid if the pudding didn't turn out well because the canned longan tasted a little sour. I'm glad it didn't! I personally prefer a creamier taste, so probably I'll try with 1 and a half can of evaporated milk next time. =D
Enjoy!
Good luck in trying!
I hope you enjoyed the recipe as well. ^_^
With love,
Aiko
Pressure Cooker Moist Butter Cake
As I was craving for something buttery and along with my friend's birthday is approaching, there comes the butter cake! I've used a pressure cooker this time to bake the cake instead of an oven. Oh well, my mom was in a bad mood and she disallowed me from using the kitchen. I had to borrow my hostel mate's pressure cooker since no one that I known of has an oven to borrow me. ;-; It didn't turn out as what I expect it is, still it's a nice try using pressure cooker to bake. XD
Recipe adapted from MariasMenu
I don't really know how to deal with the pressured cooker. I'm using electric pressure cooker instead of the stove top type, yet all recipe out there are for stove top pressure cooker. oTL So? Screw it, anyhow bake! LOL!


I've prepared the dry ingredients all together at home and pack it into one container to bring it to my hostel.


My hand being very itchy, I've added a teaspoon of cocoa powder and sprinkle of cinnamon powder. That's why the cake became caramel color. XD
No picture of the whole cake because I didn't manage to snap a picture of it before it is chopped into pieces.. >_>;
Baked it at high pressure for 5 minute and low pressure for roughly 50minute. I didn't close the cover tight enough, so I'm not sure if that affected my end product. D=
The cake is indeed MOIST, like steamed cake. >_>; It is not underbaked, but it felt dense like.. Banana cake? My friends says it's nice but I'm unsure about it myself. Personally I didn't quite like it... >_>; Not buttery enough! D:<
Guess I'll just go with a different recipe next time! With pressure cooker if possible. XD
I didn't quite enjoy this recipe, so well I hope you enjoyed reading the post instead! XDDDD
Have a nice day!
With love,
Aiko
Recipe adapted from MariasMenu
1. Butter – 125 gm, softened
2. Vanilla essence – 1 tsp
3. Caster sugar – 1 1/4 cups, (275 gm)
4. Eggs – 3, at room temp
5. Plain flour – 1 cup, (150 gm)
6. Self-raising flour – 1/2 cup, (75 gm)
7. Bicarbonate of soda – 1/4 tsp
8. Milk – 1/2 cup (125 ml) at room temp
Preheat oven to 180 C, 10 mins before baking. Grease a deep 20 cm/8 inch round cake tin; line base with baking paper. Beat ingredients in medium bowl on low speed with electric mixer until just combined. Beat on medium speed until mixture is smooth and changed to a paler colour. Pour mixture into prepared pan.
Bake cake in the preheated oven for 40-50 mins or until the skewer inserted comes out clean. Stand cake 5 minutes then turn onto wire rack; turn cake top-side up to cool. Dust cake with a little sifted icing sugar, if desired.
Notes: The batter might look curdled, but its ok, go ahead and bake it. If you want a caramel flavor, substitute 1 1/3 cups (275 gm) firmly packed brown sugar for the caster sugar.
Substitutes:
Substitution for self raising flour – to get 1 cup self-raising flour, add 1 1/2 tsp baking powder+ 1/4 tsp salt to 1 cup all purpose flour. (source: http://www.joyofbaking.com/IngredientSubstitution.html)
Substitution for caster sugar: to get 1 cup caster sugar. process 1 cup granulated sugar (usual sugar) in a food processor/mixer until fine, but don’t powder it like icing sugar. (source: http://www.joyofbaking.com/IngredientSubstitution.html)
I don't really know how to deal with the pressured cooker. I'm using electric pressure cooker instead of the stove top type, yet all recipe out there are for stove top pressure cooker. oTL So? Screw it, anyhow bake! LOL!


I've prepared the dry ingredients all together at home and pack it into one container to bring it to my hostel.


My hand being very itchy, I've added a teaspoon of cocoa powder and sprinkle of cinnamon powder. That's why the cake became caramel color. XD
No picture of the whole cake because I didn't manage to snap a picture of it before it is chopped into pieces.. >_>;
Baked it at high pressure for 5 minute and low pressure for roughly 50minute. I didn't close the cover tight enough, so I'm not sure if that affected my end product. D=
The cake is indeed MOIST, like steamed cake. >_>; It is not underbaked, but it felt dense like.. Banana cake? My friends says it's nice but I'm unsure about it myself. Personally I didn't quite like it... >_>; Not buttery enough! D:<
Guess I'll just go with a different recipe next time! With pressure cooker if possible. XD
I didn't quite enjoy this recipe, so well I hope you enjoyed reading the post instead! XDDDD
Have a nice day!
With love,
Aiko
Friday, April 15, 2011
Recipe Dedication: Nicolette's EGG TARTS!
Recipe Dedication: Nicolette's EGG TARTS!


Printable Recipes Available Here!: Print Page
Enjoy People! Stay tuned for Easter Special!
Some of the recipes here are gonna be dedicated to friends. Here's my very first one.
During poly school days, I have this friend, Nicolette, and every time we get out of class to get some food/drink, she would always go, "let's go kofu, eggie tart!". From then on, I realized that she likes egg tarts and will go "awww" if there aint no more egg tarts at the canteen that we go.
So Nicolette M'dear. Here's to you love!
Egg Tarts
========
Ingredient List
----------------
Base:
- 200g flour
- 50g sugar
- 1 egg
- 100g butter
Egg Filling:
- 3 eggs
- 80g sugar }Mix together to make sugar syrup.
- 100ml hot water }
- 100ml milk
Instructions:
!~! Pre-heat oven to 180C, Middle Shelf!~!
1. Lightly mix flour and sugar together.
2. Rub in butter into the flour mixture to get a bread crumb texture.
3. Add egg and mix well into a knead-able dough.
4. Press dough into Egg Tart Molds
5. Add eggs to milk and mix well.

6. Add in the sugar syrup to the egg/milk mixture and mix well.
7. Sieve the mixture twice.
8. Pour egg mixture into dough casing


9. Put to bake for 20 mins.

Printable Recipes Available Here!: Print Page
Enjoy People! Stay tuned for Easter Special!
With love,
Sheila <3
Sunday, April 10, 2011
Non-Bake Lemon and Lime Cheesecake
As requested by someone, I've made a sour cheese cake this time! I usually make plain cheesecake, chocolate cheesecake or tiramisu. xD The weather is super hot recently, but I want a treat so badly! I don't want to turn on my oven or stove or anything to do with heat! So, I did a non-bake cheesecake. =D
I've used the recipe from taste.com.au
In my case, I've used 250g of digestive biscuit and 120g of butter for the base. I sort of over estimated the filling (judging on the amount of base I have... =.=), I've multiplied the recipe with 1.5 and ended up with too much filling. XD Ran out of digestive biscuit already, I used the regular jacob biscuit instead. It's a little on the salty side, so I added in a tbsp of honey to give it a unique flavor.
First timer or not, do watch up this youtube video about cheesecake. It has a recipe for baked cheesecake, but the basic information mentioned are pretty useful and applied to both baking/non-bake cheesecake. =D
The Base:

Digestive biscuit crumbs mixed with butter.
I've totally forgotten to take a picture of crushing the biscuit and mixing in the butter. >_<;
Anyway, you can crush biscuits by just simply putting the biscuit in a ziplock bag or a plastic bag, probably 2-3 biscuit at a time to achieve even crumbs. Use a rolling pint or your hand/feet/body weight/whatever to crush it, till it become small and fine crumbs. Melt your butter or just room temperature butter(tropical country room temperature.. xD), mix it into the biscuit crumbs evenly.
You can use any biscuit/cookie crumb as the base. Just adjust the amount of butter accordingly, not too dry or moist. If you're feeling luxury, go ahead and use famous amos cookies as the base. I'm talking about the freshly baked ones that are sold in their outlet. Hehe xD

Line your pan with aluminum foil or baking sheet before filling in the crumbs.
Scoop the well combined crumbs into your pan and press it down firmly. If you skip this step, when you remove your cake from the pan, the base will not stay in shape and crumbles easily. D=

Shooting star!
The filling:

Ignore random objects behind/around the ingredients. xD
Here we have cream cheese, whipping cream, sugar, powder gelatine, limes and lemon!
You can substitute gelatine powder with agar agar powder, 1:1. But in this case, we're dealing with acidic ingredient, so extra agar agar powder will be required. Some say around 1/4 extra, but I'm not very sure of it myself because I never tried it before. Probably next time!

Rind your lemon/limes before squeezing the juice!
Hahaha dealing with acidic stuff on marble table, very smart of me. >_>;

I just loveee the colour <3

Strain the lime and lemon juice into a pot.
Heat up the lime + lemon juice, combine the gelatine powder in.
Not boiling! Just hot enough to dissolve the gelatine powder. You may have a little lump at first, but no worries, just continue stirring it. It will eventually fully dissolve. The mixture will turn out like a thick/gluey sauce. XD It may smell a little odd due to the gelatine, but everything will be alright when you mix it into the cream cheese.
Strain them again before adding into the cream cheese.

Make sure your cream cheese is in room temperature! Else it'll have lumps which is not good! D=
Sift sugar in while beating the cream cheese, add in gelatine mixture and lime & lemon rinds and continue beating. Be careful not to over beat it!

After beating in the gelatine+ lime & lemon juice and lime & lemon rinds

Fold in the whipping cream probably by a quarter or half at once? If you pour the whipping cream all in at one go, it'll be harder to incorporate the cream cheese in.
Don't be lazy and beat it in with a mixer! You'll have too much air bubble in it by beating it in.
Assembling:

You can just pour the mixture on your base, tap the container on a surface to smooths the surface and be done, or decorate it!
I've set aside about a cup of the filling without lime & lemon rinds, mix in a drop of green food coloring for decoration. Alternative, you can use melted chocolate or diluted jam.
Put them in a piping bag and start decorating!
Simply pipe the content on your filling, tap it on surface to incorporate it to the filling. Leave it this way, or continue decorating it as below.

Using a toothpick/satay stick/needle or anything similar, draw line across the pattern you've done. Drawing at different direction creates different pattern.
The one shown above are drawn from the edge towards the center.

In between the "draw in", draw outwards, from the center to the edge.

Tap on surface again to smooth the filling.


You can also pipe words on the cake with a semi-chilled cream cheese filling! The surface of your cake must be set before you can pipe words on. I've blurred the text on the image due to privacy. =P

When you're done, just pop it to the fridge! I left mine sits in the fridge till the top sets, then put it into a container, return it to the fridge. I'm keeping mine in the fridge till the next day.
Whoala~ It's done!............... NOT!

It's clean up time now! oTL oTL oTL

Tasting:

Tadah~ Out from the pan!
This is the one with Jacob cracker base.

The star shape one is out from the pan as well! But to conceal the writing, I'll only show a side picture. XD
It's with digestive biscuit base.

I still prefer digestive biscuit base more than crackers. =3=
Anyway! The cheesecake itself is not really sour, just a hint of tangy-ness without loosing the cream cheese flavor. Lemon & lime flavor enhanced by the rinds, also creating a little texture in between the smooth cream cheese.
The tangy feeling stays in mouth for sometime, and it sort of made my tongue feel numb. XD
I was afraid if it will turn out to be too sour because I kept tasting while making it. Probably just cause of eating too much, that's why it felt so sour. XD
Enjoy!
Good luck in trying!
I hope you enjoy the recipe as well!
Have a nice day~
With love,
Aiko
I've used the recipe from taste.com.au
Ingredients (serves 10)
* 150g plain sweet biscuits, processed to fine crumbs
* 80g butter, melted, cooled
* 500g cream cheese, softened
* 3/4 cup caster sugar
* 1 lemon, rind finely grated, juiced
* 2 limes, rind finely grated, juiced
* 1 1/2 tablespoons lime juice
* 1 1/2 tablespoons lemon juice
* 3 teaspoons powdered gelatine
* 300ml thin cream, lightly whipped
Method
1.
Grease and line base and sides of a 5.5cm deep, 22cm (base) springform pan with baking paper. Combine biscuit crumbs and butter. Press into base of prepared pan. Refrigerate while preparing filling.
2.
Using an electric mixer, beat cream cheese and sugar until smooth. Beat in lemon and lime rind. Heat 1 1/2 tablespoons lemon juice, 1 1/2 tablespoons lime juice and gelatine in a small saucepan over medium heat, stirring with a fork until hot and gelatine is dissolved. Set aside to cool slightly. Beat gelatine into cream cheese mixture until well combined. Fold in cream, mixing until well combined.
3.
Spoon filling over base. Smooth surface. Refrigerate for 4 hours or until set. Serve.
In my case, I've used 250g of digestive biscuit and 120g of butter for the base. I sort of over estimated the filling (judging on the amount of base I have... =.=), I've multiplied the recipe with 1.5 and ended up with too much filling. XD Ran out of digestive biscuit already, I used the regular jacob biscuit instead. It's a little on the salty side, so I added in a tbsp of honey to give it a unique flavor.
First timer or not, do watch up this youtube video about cheesecake. It has a recipe for baked cheesecake, but the basic information mentioned are pretty useful and applied to both baking/non-bake cheesecake. =D
The Base:

Digestive biscuit crumbs mixed with butter.
I've totally forgotten to take a picture of crushing the biscuit and mixing in the butter. >_<;
Anyway, you can crush biscuits by just simply putting the biscuit in a ziplock bag or a plastic bag, probably 2-3 biscuit at a time to achieve even crumbs. Use a rolling pint or your hand/feet/body weight/whatever to crush it, till it become small and fine crumbs. Melt your butter or just room temperature butter(tropical country room temperature.. xD), mix it into the biscuit crumbs evenly.
You can use any biscuit/cookie crumb as the base. Just adjust the amount of butter accordingly, not too dry or moist. If you're feeling luxury, go ahead and use famous amos cookies as the base. I'm talking about the freshly baked ones that are sold in their outlet. Hehe xD

Line your pan with aluminum foil or baking sheet before filling in the crumbs.
Scoop the well combined crumbs into your pan and press it down firmly. If you skip this step, when you remove your cake from the pan, the base will not stay in shape and crumbles easily. D=

Shooting star!
The filling:

Ignore random objects behind/around the ingredients. xD
Here we have cream cheese, whipping cream, sugar, powder gelatine, limes and lemon!
You can substitute gelatine powder with agar agar powder, 1:1. But in this case, we're dealing with acidic ingredient, so extra agar agar powder will be required. Some say around 1/4 extra, but I'm not very sure of it myself because I never tried it before. Probably next time!

Rind your lemon/limes before squeezing the juice!
Hahaha dealing with acidic stuff on marble table, very smart of me. >_>;

I just loveee the colour <3

Strain the lime and lemon juice into a pot.
Heat up the lime + lemon juice, combine the gelatine powder in.
Not boiling! Just hot enough to dissolve the gelatine powder. You may have a little lump at first, but no worries, just continue stirring it. It will eventually fully dissolve. The mixture will turn out like a thick/gluey sauce. XD It may smell a little odd due to the gelatine, but everything will be alright when you mix it into the cream cheese.
Strain them again before adding into the cream cheese.

Make sure your cream cheese is in room temperature! Else it'll have lumps which is not good! D=
Sift sugar in while beating the cream cheese, add in gelatine mixture and lime & lemon rinds and continue beating. Be careful not to over beat it!

After beating in the gelatine+ lime & lemon juice and lime & lemon rinds

Fold in the whipping cream probably by a quarter or half at once? If you pour the whipping cream all in at one go, it'll be harder to incorporate the cream cheese in.
Don't be lazy and beat it in with a mixer! You'll have too much air bubble in it by beating it in.
Assembling:

You can just pour the mixture on your base, tap the container on a surface to smooths the surface and be done, or decorate it!
I've set aside about a cup of the filling without lime & lemon rinds, mix in a drop of green food coloring for decoration. Alternative, you can use melted chocolate or diluted jam.
Put them in a piping bag and start decorating!
Simply pipe the content on your filling, tap it on surface to incorporate it to the filling. Leave it this way, or continue decorating it as below.

Using a toothpick/satay stick/needle or anything similar, draw line across the pattern you've done. Drawing at different direction creates different pattern.
The one shown above are drawn from the edge towards the center.

In between the "draw in", draw outwards, from the center to the edge.

Tap on surface again to smooth the filling.


You can also pipe words on the cake with a semi-chilled cream cheese filling! The surface of your cake must be set before you can pipe words on. I've blurred the text on the image due to privacy. =P

When you're done, just pop it to the fridge! I left mine sits in the fridge till the top sets, then put it into a container, return it to the fridge. I'm keeping mine in the fridge till the next day.
Whoala~ It's done!............... NOT!

It's clean up time now! oTL oTL oTL

Tasting:

Tadah~ Out from the pan!
This is the one with Jacob cracker base.

The star shape one is out from the pan as well! But to conceal the writing, I'll only show a side picture. XD
It's with digestive biscuit base.

I still prefer digestive biscuit base more than crackers. =3=
Anyway! The cheesecake itself is not really sour, just a hint of tangy-ness without loosing the cream cheese flavor. Lemon & lime flavor enhanced by the rinds, also creating a little texture in between the smooth cream cheese.
The tangy feeling stays in mouth for sometime, and it sort of made my tongue feel numb. XD
I was afraid if it will turn out to be too sour because I kept tasting while making it. Probably just cause of eating too much, that's why it felt so sour. XD
Enjoy!
Good luck in trying!
I hope you enjoy the recipe as well!
Have a nice day~
With love,
Aiko
Subscribe to:
Posts (Atom)