YAY! Another Recipe Dedication!
This is for my colleague. Jane <3
I happen to remember that I had one can of tuna in water left in my drystore cabinet, so why not make some tuna pancakes? :D
Ingredients
============
1 canned tuna in water, smashed with a fork
half an onion, chopped & diced
1 garlic clove, chopped & diced
2 eggs
2-5 tablespoon plain flour
salt
pepper
vegetable oil/canola oil/sunflower oil
Instructions
====================
CCJ-1: Mix the canned tuna, diced onion and diced garlic together
CCJ-2: Crack 2 eggs in and mix well.
CCJ-3: Add flour (depending how pancake like you want it to be) and mix well
CCJ-4: Heat a generous amount of vegetable oil ( or other oil), in a skillet/pan
CCJ-5: Spoon the tuna pancake batter onto the heated pan and cook it until the bottom is golden brown.
CCJ-6: Once golden brown, flip them and cook the other side until golden brown too.
CCJ-7: When both sides are golden brown, drain excess oil and plate up
and Voila! You are ready to nom on these lovely tuna pancakes!
I bought them to office and gave to my close colleagues to nom, though my pancakes weren't very pancake-like cos' I only added 2 tablespoons of flour. (Will need to add more flour next time!)
Recently, I've been busy and broke to be honest, so that's why I didn't manage to do the recipes that I've listed at the left side column. oTL. Please bear with me lovelies.
With Much Love,
Sheila <3 XOXOXOXO
Showing posts with label Snacks. Show all posts
Showing posts with label Snacks. Show all posts
Thursday, July 19, 2012

Tuesday, June 26, 2012
Recipe Dedication: Claudia's Cornflake Cookies
Okay! Here's another recipe dedication. This time it's for my colleague, Claudia.
Haha, she's been pestering and reminding me to make these cookies for her as she really loves them a lot, and I mean a lot.
Just so happen, I got cornflakes from NTUC(a local supermarket) last night while grocery shopping for my dinner. So I thought, why not bake 'em?
Andddddd! I baked these lovelies in the early morning of 6am. Reasons being that my cats has been trying to wake me up from 5am in the damn morning cos' they're hungry. oTL
So Claudia, Here's to you! <3~!
Cornflake Cookies
==================
190C
Baking time : 15 min
Ingredients:
-----------------------
150g Butter
150g Sugar
1 egg
2 teaspoon baking powder
200g Flour
drops of vanilla essence
Instructions:
------------------------
C.C-1: Cream Butter and Sugar together until light and fluffy
C.C-2: Add Vanilla essence and egg and mix well.
C.C-3: Fold in the flour and baking powder (the dough would be sticky)
C.C-4: Crush 100g of cornflakes and fold into the dough.
C.C-5: Line your baking sheets with parchment paper/baking paper
C.C-6: Roll bits of dough and coat them with excess crushed cornflakes and press them on the baking sheet.
C.C-7: Bake in a pre-heated over at 190C for 15 mins
C.C-8: Remove from oven and leave to cool completely.
It's that simple! I brought a ziplock-full of these lovelies for Claudia just today and She's one happy girl, literally! hahaha! If you don't like cornflakes in your cookies and only want them coating the cookies, just simply omit the adding of crushed cornflakes into the dough.
And oh, did I mention that you can use Nestum as well? It tastes as beautiful and yummy like these cornflake cookies!.
With Much love,
Sheila <3 XOXOXOXOXO
Haha, she's been pestering and reminding me to make these cookies for her as she really loves them a lot, and I mean a lot.
Just so happen, I got cornflakes from NTUC(a local supermarket) last night while grocery shopping for my dinner. So I thought, why not bake 'em?
Andddddd! I baked these lovelies in the early morning of 6am. Reasons being that my cats has been trying to wake me up from 5am in the damn morning cos' they're hungry. oTL
So Claudia, Here's to you! <3~!
Cornflake Cookies
==================
190C
Baking time : 15 min
Ingredients:
-----------------------
150g Butter
150g Sugar
1 egg
2 teaspoon baking powder
200g Flour
drops of vanilla essence
Instructions:
------------------------
C.C-1: Cream Butter and Sugar together until light and fluffy
C.C-2: Add Vanilla essence and egg and mix well.
C.C-3: Fold in the flour and baking powder (the dough would be sticky)
C.C-4: Crush 100g of cornflakes and fold into the dough.
C.C-5: Line your baking sheets with parchment paper/baking paper
C.C-6: Roll bits of dough and coat them with excess crushed cornflakes and press them on the baking sheet.
C.C-7: Bake in a pre-heated over at 190C for 15 mins
C.C-8: Remove from oven and leave to cool completely.
It's that simple! I brought a ziplock-full of these lovelies for Claudia just today and She's one happy girl, literally! hahaha! If you don't like cornflakes in your cookies and only want them coating the cookies, just simply omit the adding of crushed cornflakes into the dough.
And oh, did I mention that you can use Nestum as well? It tastes as beautiful and yummy like these cornflake cookies!.
With Much love,
Sheila <3 XOXOXOXOXO
Tuesday, June 19, 2012
microwave cookies
LO! it's another microwave recipe! LOL
I was really bored one night and went on to youtube to find random food recipes and all,
then I stumbled upon this microwave cookie recipe by Ochikeron, and I decided that I would try it out!
Ingredients:
----------------------
1/2cup = 125ml butter (softened) *100g (3.5oz.)
1/4cup = 62.5ml granulated sugar
1 egg
1cup = 250ml cake flour
1/2 tsp. baking powder
Instructions:
-----------------------------
M.C-1. Cream the butter and sugar until light and fluffy
M.C-2. Beat in the egg and mix well.
M.C-3. Fold in the cake flour and baking powder.
M.C-4. Spoon or pipe your cookie dough onto small pieces of baking paper and pop them in the microwave, on high for 2-3 minutes.
!*! Always look at the cookies, as they burn easily !*!
M.C-5. After 203 minutes, remove from microwave and leave to cool completely!
THAT"S ALL! Hahaha! this recipe is dead easy and dead fast.
You can add chocolate chips or dried fruits in, anything to your preference.
Microwave cooking often cooks food from the inside out hence it is always wise to keep an eye on your food while it's spinning round and round in the microwave.
UPDATE NOTE!
I have actually planned out recipes to start/finish up week by week so I do hope I have the time to do those and update as much as I can.
With Much Love,
Sheila XOXOXOXOXO!
I was really bored one night and went on to youtube to find random food recipes and all,
then I stumbled upon this microwave cookie recipe by Ochikeron, and I decided that I would try it out!
Ingredients:
----------------------
1/2cup = 125ml butter (softened) *100g (3.5oz.)
1/4cup = 62.5ml granulated sugar
1 egg
1cup = 250ml cake flour
1/2 tsp. baking powder
Instructions:
-----------------------------
M.C-1. Cream the butter and sugar until light and fluffy
M.C-2. Beat in the egg and mix well.
M.C-3. Fold in the cake flour and baking powder.
M.C-4. Spoon or pipe your cookie dough onto small pieces of baking paper and pop them in the microwave, on high for 2-3 minutes.
!*! Always look at the cookies, as they burn easily !*!
M.C-5. After 203 minutes, remove from microwave and leave to cool completely!
THAT"S ALL! Hahaha! this recipe is dead easy and dead fast.
You can add chocolate chips or dried fruits in, anything to your preference.
Microwave cooking often cooks food from the inside out hence it is always wise to keep an eye on your food while it's spinning round and round in the microwave.
UPDATE NOTE!
I have actually planned out recipes to start/finish up week by week so I do hope I have the time to do those and update as much as I can.
With Much Love,
Sheila XOXOXOXOXO!
Tuesday, June 12, 2012
Madeleines!
Another post up!
Well, I actually made Madeleine for the first time on Mother's day itself.
Often I'll find these beautiful sweet things selling in Delifrance, they comes in packs of 3-6?
Oven at 180C, middle Shelf/Rack
Ingredients
------------------
125g Plain Flour, Sifted 3 times
2 Eggs
170g Caster Sugar
185g Melted Butter
Instructions
--------------------
M.1 - Mix eggs and sugar in a heatproof bowl.
M.2 - Place egg mixture over a pot of boiling water ( Careful not to let the water touch the bottom of the bowl)
M.3 - Beat the mixture until pale and has thickened.
Well, I actually made Madeleine for the first time on Mother's day itself.
Often I'll find these beautiful sweet things selling in Delifrance, they comes in packs of 3-6?
Oven at 180C, middle Shelf/Rack
Ingredients
------------------
125g Plain Flour, Sifted 3 times
2 Eggs
170g Caster Sugar
185g Melted Butter
Instructions
--------------------
M.1 - Mix eggs and sugar in a heatproof bowl.
M.2 - Place egg mixture over a pot of boiling water ( Careful not to let the water touch the bottom of the bowl)
M.3 - Beat the mixture until pale and has thickened.
M.4 - Remove from heat and continue beating until thick
M.5 - Add melted butter and flour and fold into the batter
!.! Optional. For better looking madelienes, chill in the fridge for about 3o minutes to an hour!.!
M.6 - Spoon in the batter into a floured madeleine pan.
M.7 - Bake in a pre-heat oven at 180C for 12- 14 minutes.
M.8 - Remove and let it completely cool.
I actually didn't chill the batter before baking, that's why the top(bottom) of my madeleine are crackly and ugly.
Despite their appearances, they tasted really yummy! and it goes oh so well with any type of tea. *melts* I would sneak out one every night from the fridge and nom on them before going to bed. Fattening but oh so delicious!
With much love,
Sheila <3
Wednesday, June 6, 2012
Apple Pie~!
HOKAY! I've been craving apple pies for sometime (I crave for a lot of food actually, haha!)
I'll keep things short and sweet! :D
Ingredients
----------------------
300g Apples, peeled and chopped into bite sized cubes
100g Sugar
Half a lemon
Dough:
130g flour
100g cold butter
20-30ml cold water
Preheat oven at 230C.
*Bishi Bashi Voice* Instructions!
-------------------------------------------------
Filling:
F-1. Add apples and sugar into pot and cook over medium heat.
F-2. Squeeze half a lemon and mix well. Continue cooking until apples are soft
F-3. About 15 minutes later, remove pot from heat and leave to cool completely.
Dough:
D-1. Rub the cold butter into the flour, it should resemble bread crumbs
D-2. Add cold water bit by bit, you don't need to use it all anyway
! If the dough is too wet, add more flour. If dough is too dry, add water !
Assembly:
A-1. Press small dough balls into the mould.
~!~ If you're making a normal pie size, roll the dough out on a floured board and place the dough over the pan and adjust. ~!~
A-2. Spoon in the apple filling.
A-3. Cover with dough, Here's where you can be creative with your pie tops
A-4. Glaze your pies with 1 beaten egg.
A-5. Bake them lovelies in a preheat oven at 230C for 15 minutes
A-6. After 15 minutes, Take them out and leave them to cool completely.
*Optional*Once cooled, you have pop them in the fridge and serve later
That's all for the apple pie!
Well, you could tell that I was being lazy with my pie top, mainly because I took this video around 10PM and I'm feeling the sleepy monster attacking my body.
You can eat your apple pie with ice cream, whipped cream or anything that you like to have them with.
Wonderful for tea and dessert them lovelies. <3
With Much Love,
Sheila <3
I'll keep things short and sweet! :D
Ingredients
----------------------
300g Apples, peeled and chopped into bite sized cubes
100g Sugar
Half a lemon
Dough:
130g flour
100g cold butter
20-30ml cold water
Preheat oven at 230C.
*Bishi Bashi Voice* Instructions!
-------------------------------------------------
Filling:
F-1. Add apples and sugar into pot and cook over medium heat.
F-2. Squeeze half a lemon and mix well. Continue cooking until apples are soft
F-3. About 15 minutes later, remove pot from heat and leave to cool completely.
Dough:
D-1. Rub the cold butter into the flour, it should resemble bread crumbs
D-2. Add cold water bit by bit, you don't need to use it all anyway
! If the dough is too wet, add more flour. If dough is too dry, add water !
Assembly:
A-1. Press small dough balls into the mould.
~!~ If you're making a normal pie size, roll the dough out on a floured board and place the dough over the pan and adjust. ~!~
A-2. Spoon in the apple filling.
A-3. Cover with dough, Here's where you can be creative with your pie tops
A-4. Glaze your pies with 1 beaten egg.
A-5. Bake them lovelies in a preheat oven at 230C for 15 minutes
A-6. After 15 minutes, Take them out and leave them to cool completely.
*Optional*Once cooled, you have pop them in the fridge and serve later
That's all for the apple pie!
Well, you could tell that I was being lazy with my pie top, mainly because I took this video around 10PM and I'm feeling the sleepy monster attacking my body.
You can eat your apple pie with ice cream, whipped cream or anything that you like to have them with.
Wonderful for tea and dessert them lovelies. <3
With Much Love,
Sheila <3
Saturday, June 2, 2012
Vanilla Cupcake with Buttercream Frosting
Okayyy~ Might as well update some more now that it's the weekend and I'm kinda free(?)
I've made this quite a while back because I was bored and really needed to be in the kitchen to meddle around with my flours, eggs, butter and sugar. <3
So here goes!
Pre-heat Oven at 180C/350F
Ingredient list
~ Vanilla Cupcake ~
- 113g(1/2 cup) unsalted butter, softened
- 2/3 cup granulated white sugar
- 3 eggs
- 1 tsp vanilla extract/flavoring/essence
- 1 1/2 cup all purpose flour
- 1 1/2 tsp baking powder
- 1/4 tsp salt
- 1/4 cup milk
~Buttercream Frosting~
- 2 cups icing sugar
- 113g(1/2 cup) unsalted butter, softened
- 1 tsp vanilla extract/flavoring/essence
- 2 to 3 tbsp milk
Instructions!*Bishi Bashi voice*
--------------------------------------------
Pop in the video!
1. Cream butter and sugar until light and fluffy
2. Beat in one egg at a time and mix well, followed by the vanilla essence
3. Add flour and milk alternately, starting with flour and ending with flour. (flour milk flour milk flour)
4.Fill your lined cupcake/muffin pan up till 2/3 full
5. Pop them into a preheated oven of 180C, and bake them for 20 minutes.
While them babies are baking , Let's make the buttercream frosting
B.C 1. Cream icing sugar and butter together until creamy
B.C 2. Add vanilla extract and milk and mix well
*Optional* Add any other flavorings or colors that you want to have. :D
6. After 20 minutes, remove from oven and let it cool completely till room temperature.
7. When it is cooled to room temperature, prepare your piping bag with your favorite nozzle and start decorating them babies!
These can be stored in the fridge for a maximum of 3 days. But best to eat it fresh on the same day.
Enjoy them lovelies as breakfast, with afternoon tea and even a simple sweet dinner treat. You can also pack them up and give them as small food gifts to family, friends and colleagues!
If you do make them and decorated them with icing, Share your photos with us! We'll post them up and share our cute and pretty icing decorations, as well as techniques on piping and decoration! :D
With Much Love,
Sheila <3
I've made this quite a while back because I was bored and really needed to be in the kitchen to meddle around with my flours, eggs, butter and sugar. <3
So here goes!
Pre-heat Oven at 180C/350F
Ingredient list
~ Vanilla Cupcake ~
- 113g(1/2 cup) unsalted butter, softened
- 2/3 cup granulated white sugar
- 3 eggs
- 1 tsp vanilla extract/flavoring/essence
- 1 1/2 cup all purpose flour
- 1 1/2 tsp baking powder
- 1/4 tsp salt
- 1/4 cup milk
~Buttercream Frosting~
- 2 cups icing sugar
- 113g(1/2 cup) unsalted butter, softened
- 1 tsp vanilla extract/flavoring/essence
- 2 to 3 tbsp milk
Instructions!*Bishi Bashi voice*
--------------------------------------------
Pop in the video!
1. Cream butter and sugar until light and fluffy
2. Beat in one egg at a time and mix well, followed by the vanilla essence
3. Add flour and milk alternately, starting with flour and ending with flour. (flour milk flour milk flour)
4.Fill your lined cupcake/muffin pan up till 2/3 full
5. Pop them into a preheated oven of 180C, and bake them for 20 minutes.
While them babies are baking , Let's make the buttercream frosting
B.C 1. Cream icing sugar and butter together until creamy
B.C 2. Add vanilla extract and milk and mix well
*Optional* Add any other flavorings or colors that you want to have. :D
6. After 20 minutes, remove from oven and let it cool completely till room temperature.
7. When it is cooled to room temperature, prepare your piping bag with your favorite nozzle and start decorating them babies!
These can be stored in the fridge for a maximum of 3 days. But best to eat it fresh on the same day.
Enjoy them lovelies as breakfast, with afternoon tea and even a simple sweet dinner treat. You can also pack them up and give them as small food gifts to family, friends and colleagues!
If you do make them and decorated them with icing, Share your photos with us! We'll post them up and share our cute and pretty icing decorations, as well as techniques on piping and decoration! :D
With Much Love,
Sheila <3
Friday, June 1, 2012
cake in a mug: Milo Flavor
Well...Since I DO have the time, why not another post? :D
I made this Cake-In-A-Mug for breakfast in my office where I'm currently working at and this video was taken like about 2 months ago(?). Procrastination resides in nearly everyone hahaha!
I "wow-ed" many of my colleagues in office and been nicknamed by a colleague as "Mini Betty Crocker" ._.
Anywho, Heres the Ingredients!
Ingredients
-----------
2 tablespoon self raising flour
2 tablespoon sugar
1 egg
1 tablespoon milk
1 tablespoon sunflower oil
Instructions!
------------------------------
1. Mix the flour and sugar together in a mug(any mug would do! )
2. Crack one egg in and mix well!
3. Add sunflower oil and milk and mix well!
*OPTIONAL!* You can add dried fruits, chocolate bits, coffee powder, milo powder. well anything you like:)
4. Pop your mug into the microwave, on HIGH for 3 minutes.
[Timing varies with the voltage on the microwave, so just adjust the timing to get your desired cake]
5. After 3 minutes, remove from microwave and Enjoy!
This is really a great comfort food on any day or if you're really hungry but want something simple and sweet.
With Much Love,
Sheila <3
I made this Cake-In-A-Mug for breakfast in my office where I'm currently working at and this video was taken like about 2 months ago(?). Procrastination resides in nearly everyone hahaha!
I "wow-ed" many of my colleagues in office and been nicknamed by a colleague as "Mini Betty Crocker" ._.
Anywho, Heres the Ingredients!
Ingredients
-----------
2 tablespoon self raising flour
2 tablespoon sugar
1 egg
1 tablespoon milk
1 tablespoon sunflower oil
Instructions!
------------------------------
1. Mix the flour and sugar together in a mug(any mug would do! )
2. Crack one egg in and mix well!
3. Add sunflower oil and milk and mix well!
*OPTIONAL!* You can add dried fruits, chocolate bits, coffee powder, milo powder. well anything you like:)
4. Pop your mug into the microwave, on HIGH for 3 minutes.
[Timing varies with the voltage on the microwave, so just adjust the timing to get your desired cake]
5. After 3 minutes, remove from microwave and Enjoy!
This is really a great comfort food on any day or if you're really hungry but want something simple and sweet.
With Much Love,
Sheila <3
Blueberry Crumble Muffin
Hello Hello! Okay, It's been ages since I've last updated.
Have been busy with work and trying to take food tutorial videos with all the testing and all, hahaha!
I came across this recipe from a cookbook, Okashi, by a Japanese lady who bakes wonderful goodies, from cookies to cakes to even pet treats! Yay! And also the cravings for muffins has been nagging at me for quite a long while so I decided to give this recipe a go.
Oven: 180C, Middle Shelf/Rack
Ingredients:
------------------
Crumble:
20g Cold Butter
20g Top Flour/Pastry Flour
20g Caster Sugar
(I doubled my quantity to make more, but here's for 6 muffins)
Muffin:
120g Top flour/Pastry flour, sifted twice
1 tsp baking powder
50g Butter
40g Brown Sugar
30g Caster Sugar
1 Egg
60ml cold milk
100g Blueberries
Instructions! (For some reason, this reminds me of an arcade game, Bishi Bashi, Eng Ver. :3)
-----------------------------------------------------------------------------------------------
And YES! I made a video of it all! hahaha!
To make the crumble:
1. Rub the cold butter into the flour and sugar mixture.
2. Chill the crumble in the fridge.
Muffin!
1. Cream butter, sugar and brown sugar until it turns creamy and pale brown
2. Beat in the eggs and mix well
3. Fold in the flour and milk alternately, starting with flour then milk, in batches. (start with flour and end with flour)
4. Fold in your blueberries!
5. Spoon your batter into lined cupcake/muffin tray and sprinkle the crumble over the batter.
6. Pop them babies into a pre-heated oven @ 180C, and bake for 30 minutes.
7. After 30 minutes, bring the babies out to cool.
Enjoy your muffin with a cup of milk, tea, coffee or anything that you like to drink with your bakes.
Actually, I've made a few bake videos already but I didn't have the free to really upload and post it here. I'll try to update as much as possible! :DD
With Much Love,
Sheila <3
Have been busy with work and trying to take food tutorial videos with all the testing and all, hahaha!
I came across this recipe from a cookbook, Okashi, by a Japanese lady who bakes wonderful goodies, from cookies to cakes to even pet treats! Yay! And also the cravings for muffins has been nagging at me for quite a long while so I decided to give this recipe a go.
Oven: 180C, Middle Shelf/Rack
Ingredients:
------------------
Crumble:
20g Cold Butter
20g Top Flour/Pastry Flour
20g Caster Sugar
(I doubled my quantity to make more, but here's for 6 muffins)
Muffin:
120g Top flour/Pastry flour, sifted twice
1 tsp baking powder
50g Butter
40g Brown Sugar
30g Caster Sugar
1 Egg
60ml cold milk
100g Blueberries
Instructions! (For some reason, this reminds me of an arcade game, Bishi Bashi, Eng Ver. :3)
-----------------------------------------------------------------------------------------------
And YES! I made a video of it all! hahaha!
To make the crumble:
1. Rub the cold butter into the flour and sugar mixture.
2. Chill the crumble in the fridge.
Muffin!
1. Cream butter, sugar and brown sugar until it turns creamy and pale brown
2. Beat in the eggs and mix well
3. Fold in the flour and milk alternately, starting with flour then milk, in batches. (start with flour and end with flour)
4. Fold in your blueberries!
5. Spoon your batter into lined cupcake/muffin tray and sprinkle the crumble over the batter.
6. Pop them babies into a pre-heated oven @ 180C, and bake for 30 minutes.
7. After 30 minutes, bring the babies out to cool.
Enjoy your muffin with a cup of milk, tea, coffee or anything that you like to drink with your bakes.
Actually, I've made a few bake videos already but I didn't have the free to really upload and post it here. I'll try to update as much as possible! :DD
With Much Love,
Sheila <3
Sunday, July 3, 2011
Buttermilk Biscuits
Ever crave for Popeye's or Texas Chicken's Biscuits? Wanna buy 'em but they are kinda expensive?


FRET NOT! Now you can make them, homemade baby! :DD*Winks*
Ingredient(s)
==============
- 2 cups all-purpose flour/plain flour
- 2 tablespoon baking powder
- 1/4 teaspoon baking soda
- 1 teaspoon salt
- 100g unsalted butter, frozen
- 3/4 cups cold buttermilk
Method
==============
~~Oven Temperature to 220 degrees Celsius ~~
1. Mix the flour, baking powder, baking soda and salt with a wired whisk/balloon whisk, to aerate the flour mixture.

2. Add in the butter and mix the butter with the flour using the wired whisk/balloon whisk till the flour resembles bread flour.
3. Make a well in the center, and pour in the buttermilk and using a spatula, gently cover the buttermilk with the flour and lightly mix, just enough to coat the dry ingredients.
4. Turn the dough out and gather them up, (Don't worry about the excess crumbs), and shape it into a rectangle.
5. Press the dough down and then fold in 3 parts. (left to center, right to center), turn it over and repeat for 2 more times.
6. Roll the dough out on a floured board/flat surface and using a simple cookie cutter to cut. Roll up the excess and continue to get more pieces.

7. Place the dough onto a greased baking tray or onto parchment paper lined baking tray. Using your thumb to make an indent in the center of the dough, [This will help it rise uniformly.], and lightly coat the top with buttermilk
8. Bake them for 15 minutes.
9. Remove from oven and cool.


10. Serve with jam or other condiments.
HOHO! There you have it! Homemade Buttermilk Biscuits!
Dreadfully sorry for the lack of pictures, I'm doing this on my own and when I reached the kneading the dough, my hands are all stuck with dough and couldn't take a picture.
Our Printable Available here! : Prints!
Enjoy Darlings!
With love,
Sheila <3
Monday, June 27, 2011
Canned Fruit Agar Agar
Woo! Double Post! YAY!


A refreshing Dessert for a hot weather here in Tropical Singapore!
Ingredient List
============
- 30g agar agar Strips
- 1200ml Water + extra water for soaking the agar agar
- sugar to taste
- Preferred Canned fruits (peach, longans, pineapple, etc)
- Optional: Flavorings + Colorings
Instructions
==========
1. Wash and soak the agar agar strips for 10 minutes.


2. While the strips are soaking, boil 1200ml of water.
3. After 10 minutes and the water is boiling, add the agar agar strips and add sugar to taste and stir occasionally to melt and prevent from burning/scalding.

4. chop up canned fruits and set aside.
5. Once fully dissolved, remove from heat and let it set for 1 minute.
6. Put chopped canned fruits into the jelly molds and scoop the agar agar over the fruits in the jelly molds.
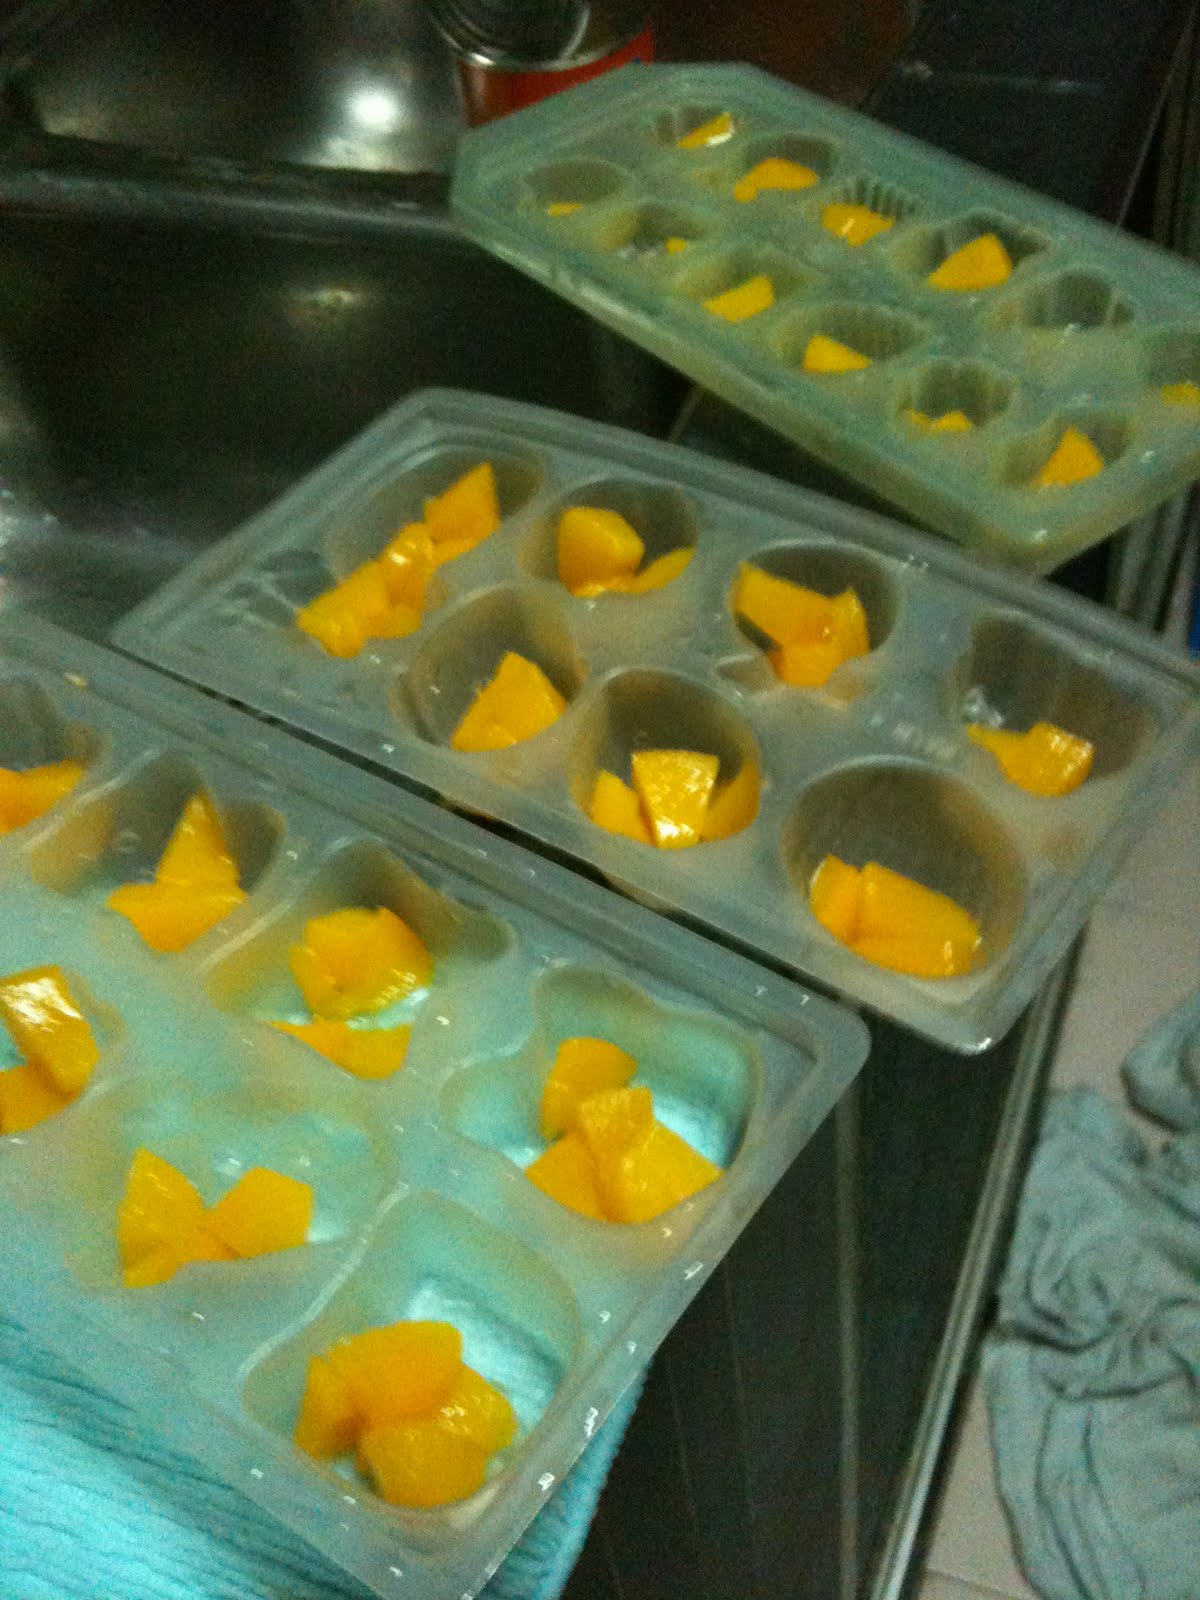
7. Leave the agar agar to completely cool and chill in the fridge.
8. Serve cold.

enjoy this yummy treat for the hot weather! yes!
Printable Recipe Available Here! : Print Page
With Love,
Sheila, Double <3
Wednesday, May 11, 2011
Milk Longan Pudding / Agar Agar
LONGAN LONGAN LONGAN LONGAN! My craving just wont stop! Lol.
Another craving of the week, milk longan pudding! <3
It's been years since I had it. My aunt used to make it last time and I love it! Sadly she just don't make them anymore. =3=
It's really easy to make and very less time is needed! I highly recommend to try it!
Recipe adapted from Jiayeen

I've left pandan leaves out of my pudding because I've forgotten to bring it back from my house.. XD
Remember to boil the agar agar strips till it melt thoroughly~
Let the mixture cool under a fan for about 10minute before putting it into the container. Not too long! Because it will solidify at room temperature! Leave it continue cooling down to room temperature in the container then put it into the fridge.
Tadah~ The ugly one that I kept it for myself. XD

The pretty one for my friend

It is pretty important to pick, or more like lucky draw on a can of good canned longan. The can I bought wasn't made with fresher longan. Although it is canned, but sometime it really depends on your luck in getting a good or bad batch of it. Good ones will have similar crisp with fresh longan and bad ones are similar with lychee. Not really that bad but I didn't quite like the texture of bad longan. D=
I was really afraid if the pudding didn't turn out well because the canned longan tasted a little sour. I'm glad it didn't! I personally prefer a creamier taste, so probably I'll try with 1 and a half can of evaporated milk next time. =D
Enjoy!
Good luck in trying!
I hope you enjoyed the recipe as well. ^_^
With love,
Aiko
Another craving of the week, milk longan pudding! <3
It's been years since I had it. My aunt used to make it last time and I love it! Sadly she just don't make them anymore. =3=
It's really easy to make and very less time is needed! I highly recommend to try it!
Recipe adapted from Jiayeen
Ingredients:
* 1500ml Water
* 1/2 packet Agar-agar Strips
* 150g Caster Sugar
* 3 leaves Pandan Leaf
* 1 tin Longan in Heavy Syrup
* 1 tin "Carnation" Evaporated Creamer
* Plastic container with cover
Method:
1. Place water, agar-agar strips, caster sugar & pandan leaves in a pot, bring to boil. Turn off the fire & remove pandan leaves.
2. Pour in longan syrup & evaporated Creamer, stir well.Leave to cool.
^Don't leave it cool! The mixture will solidify at room temperature.
3. Apportion 1 tin of longan fruit into the mini-containers & pour in the agar-agar mixture.

I've left pandan leaves out of my pudding because I've forgotten to bring it back from my house.. XD
Remember to boil the agar agar strips till it melt thoroughly~
Let the mixture cool under a fan for about 10minute before putting it into the container. Not too long! Because it will solidify at room temperature! Leave it continue cooling down to room temperature in the container then put it into the fridge.
Tadah~ The ugly one that I kept it for myself. XD

The pretty one for my friend

It is pretty important to pick, or more like lucky draw on a can of good canned longan. The can I bought wasn't made with fresher longan. Although it is canned, but sometime it really depends on your luck in getting a good or bad batch of it. Good ones will have similar crisp with fresh longan and bad ones are similar with lychee. Not really that bad but I didn't quite like the texture of bad longan. D=
I was really afraid if the pudding didn't turn out well because the canned longan tasted a little sour. I'm glad it didn't! I personally prefer a creamier taste, so probably I'll try with 1 and a half can of evaporated milk next time. =D
Enjoy!
Good luck in trying!
I hope you enjoyed the recipe as well. ^_^
With love,
Aiko
Friday, April 15, 2011
Recipe Dedication: Nicolette's EGG TARTS!
Recipe Dedication: Nicolette's EGG TARTS!


Printable Recipes Available Here!: Print Page
Enjoy People! Stay tuned for Easter Special!
Some of the recipes here are gonna be dedicated to friends. Here's my very first one.
During poly school days, I have this friend, Nicolette, and every time we get out of class to get some food/drink, she would always go, "let's go kofu, eggie tart!". From then on, I realized that she likes egg tarts and will go "awww" if there aint no more egg tarts at the canteen that we go.
So Nicolette M'dear. Here's to you love!
Egg Tarts
========
Ingredient List
----------------
Base:
- 200g flour
- 50g sugar
- 1 egg
- 100g butter
Egg Filling:
- 3 eggs
- 80g sugar }Mix together to make sugar syrup.
- 100ml hot water }
- 100ml milk
Instructions:
!~! Pre-heat oven to 180C, Middle Shelf!~!
1. Lightly mix flour and sugar together.
2. Rub in butter into the flour mixture to get a bread crumb texture.
3. Add egg and mix well into a knead-able dough.
4. Press dough into Egg Tart Molds
5. Add eggs to milk and mix well.

6. Add in the sugar syrup to the egg/milk mixture and mix well.
7. Sieve the mixture twice.
8. Pour egg mixture into dough casing


9. Put to bake for 20 mins.

Printable Recipes Available Here!: Print Page
Enjoy People! Stay tuned for Easter Special!
With love,
Sheila <3
Thursday, April 7, 2011
Feedback: Japan Food Hour: Tofu Umegae Mochi
Looking at Sheila's post, I began to feel tempted with making one myself! Refer to her post for the recipe. Here's my bunch of pictures! XD

I've chosen Japanese pressed tofu over silken tofu because the tofu flavor is richer. Chocolate chip and toffee bits(which then became caramel) as filling.
PS: I'm staying in dorm, so I have to cook in my room. Hence the background with LCD. xD

Tofu tofu~

Rolled into individual serving before putting in fillings

Pre-test! XDDDD nyom nyom nyom chocooo

Looks like scallop isn't it? xD

Final product! Tadah~
The top 2 are with Milk Chocolate filling and bottom 2 are with Caramel filling. <3 Personally I like both in their own way.

If you're planning to try making the one with caramel filling, please do not warp the filling in if you're not cooking it as soon as you made it. The filling will melt inside the uncooked mochi. >_< My toffee melted into water puddle before I can manage to cook it. T_T
Not very pretty but it taste good! =D
Good luck in trying!
I hope you enjoy the recipe as well!
Have a nice day~
With love,
Aiko

I've chosen Japanese pressed tofu over silken tofu because the tofu flavor is richer. Chocolate chip and toffee bits(which then became caramel) as filling.
PS: I'm staying in dorm, so I have to cook in my room. Hence the background with LCD. xD

Tofu tofu~

Rolled into individual serving before putting in fillings

Pre-test! XDDDD nyom nyom nyom chocooo

Looks like scallop isn't it? xD

Final product! Tadah~
The top 2 are with Milk Chocolate filling and bottom 2 are with Caramel filling. <3 Personally I like both in their own way.

If you're planning to try making the one with caramel filling, please do not warp the filling in if you're not cooking it as soon as you made it. The filling will melt inside the uncooked mochi. >_< My toffee melted into water puddle before I can manage to cook it. T_T
Not very pretty but it taste good! =D
Good luck in trying!
I hope you enjoy the recipe as well!
Have a nice day~
With love,
Aiko
Sunday, April 3, 2011
Japan Food Hour: Tofu Umegae Mochi
--Tofu Umegae Mochi--

3. Flatten the dough out and place your filling(s) in the center and wrap them up.


Enjoy this lovely healthy snack hot or cold! It can be eaten cold because of the tofu!
This is a healthy snack that you can make under an hour or even half hour when you get the hang of it. Tofu Umegae Mochi is Toasted tofu rice cake with your desired fillings such as red bean paste, soybean flour paste or even chocolate(milk/white).
It's healthy because there's no need to add sugar to the dough at all, it's just tofu and glutinous rice flour and the sweet flavor/taste comes from the filling itself.
So here goes!
Ingredient List
=============
- 120g Glutinous Rice Flour
- Half package of silken Tofu
- Water
Fillings are as what you desire to put in. I went with Cadbury Dream, White Chocolate [ I'm a super fan of white chocolate! ]
- one bar of Cadbury Dream, broken up into individual pieces.
Instructions
===========
1. Mix the tofu and glutinous rice flour together, to obtain a soft pliable dough. The dough should be soft as your own earlobe. [ Japanese people would describe it like that. ]
!~! If the dough is too dry, add a bit of water and mix. Or if the dough is too wet, add rice flour !~!
2. Divide and shape/mold your dough into balls.


4. Prepare a pan over low heat, Add a bit of oil if needed. Cook one side for 1 min, then flip to the other side for 3 minutes. The rice cakes should expand in size and will be toasted on both side.
!~! If you're afraid that the rice cake may not be cooked well, cook a bit longer, flipping the rice cakes every now and then. !~!


Enjoy this lovely healthy snack hot or cold! It can be eaten cold because of the tofu!
Printable Recipe Available Here! : Print Page
With Love,
Sheila<3
Subscribe to:
Posts (Atom)